Automating your HiFiBerry with Node-RED
Automating your HiFiBerry with Node-RED
The following guide will show you how to integrate your HiFiBerry system into a Node-RED installation to control it with an Amazon Echo. This is just an example. You will find lots of other plugins for Node-RED that allow you to integrate it with other voice-control system, messenger or whatever you can think of.
[asis] For questions on Node-RED, you should we recommend the Node-RED community.
Install your HiFiBerry system
For this example, we’re using HiFiBerryOS. The reason it simple: It already comes with a simple API that’s easy to integrate into automation systems.
Install Node-RED
Download and install Node-RED. If you plan to do this in a docker container, make sure that it uses host networking. Otherwise service discovery for Amazon Echo won’t work.
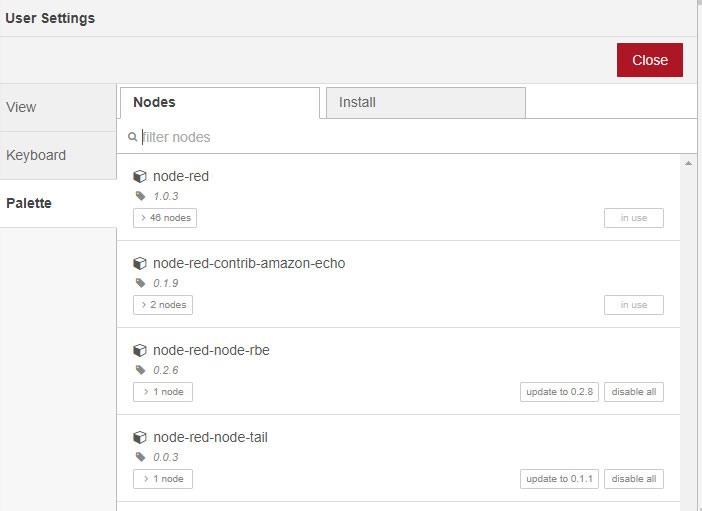
Install the Amazon Echo plugin
In the “Manage palette” menu, install the module node-red-contrib-amazon-echo.
This module will allow your Node-RED system to communicate with Amazon Echo. As there is no support for local music players in Amazon Echo, this
device will just emulate a Phillips Hue lamp. The Echo device will think it is controlling a lamp.
The flow
The flow is quite simple. The Echo hub is connected to an Echo device called “Tannoy”. It’s just called like this as it is Tannoy speaker. Just name your device as you like. However, names starting with “Music” won’t work as Alexa will try to play music locally on the Alexa device.
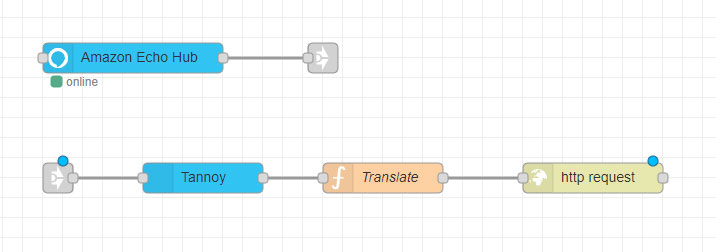
Commands will be sent to a “translate” node that than sends the command to an HTTP request node.
The translate node
The translate node is necessary to map the output from the Alexa device to the format that the HiFiBerryOS API uses. It’s a few simple lines of Javascript code. You can do the same with “switch” and “template” nodes if you don’t wont to code this in Javascript.
res={}
if (msg.on) {
  res.url="http://192.168.30.121:81/api/player/play"
} else {
  res.url="http://192.168.30.121:81/api/player/stop"
}
res.payload=""
return res;
Where does the URL come from? Just check out the documentaion of the API.. Also make sure, the HTTP requests mode is configured to use the POST method.
That’s it. You can now ask Alexa to “turn off Tannoy” or “turn on Tannoy” to start/stop playback.
More automations selecting a radio station
Interested in going one step further? Let’s implement a function to tell Alexa to start a playback of a specific radio stations.
Most people listen to only a few radio stations. Therefore we will just implement a device for each station that can be started.
The AudioControl API that we used in the last example can’t be used here as it doesn’t provide a functions to start a specific radio stream. But there’s another way for this: MPD. MPD – the Music player daemon is built into HiFiBerryOS and can also be controlled remotely. If you start playing a radio stream with MPD, HiFiBerryOS will automatically stop other players. That simplifies the control for our project.
Have a look at the following flow:
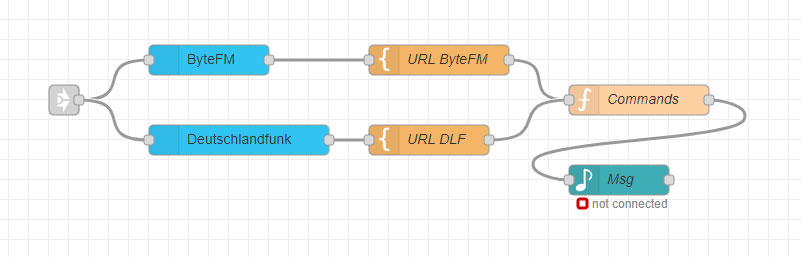
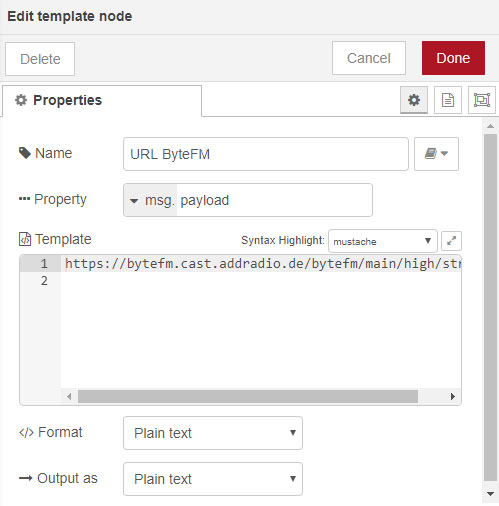
We created 2 devices- The “template” node for each just sends the URL of the stream:
The “commands” function now creates the right commands for MPD:
var url=msg.payload

var msg1 = { payload:"clear" };
var msg2 = { payload:"add "+url };
var msg3 = { payload:"play" };
return [ [ msg1, msg2, msg3 ]];
The trick here is to return 3 separate messages that will be send to MPD one after the other. These commands will now be forwarded to an MPD output node (you need to install the node-red-contrib-mpd module for this).