Bang & Olufsen Penta refresh project
Bang & Olufsen Penta refresh project
Big loudspeakers aren’t so popular today anymore. While this is a problem for manufacturers of high-quality audio equipment, it brings you the opportunity to get used high-quality loudspeakers for very few money. One of my personal favourite audio brand have always been Bang & Olufsen. While there are a lot of manufacturers that can build good-sounding equipment and others that can build good-looking speakers, B&O can do both. Their flagship speaker from the 1980’s is not what you would expect if you only know their current product line. This isn’t a tiny speaker, but it still doesn’t feel to bulky. It’s a 3-ways design with 9 drivers per speaker (tweeter, 4x midrange, 4x woofer). This massive amount of speakers isn’t just for show. It allows the speaker to play really LOUD, but also minimises sound reflections on the floor and the ceiling which are the most problematics parts in usual living rooms.
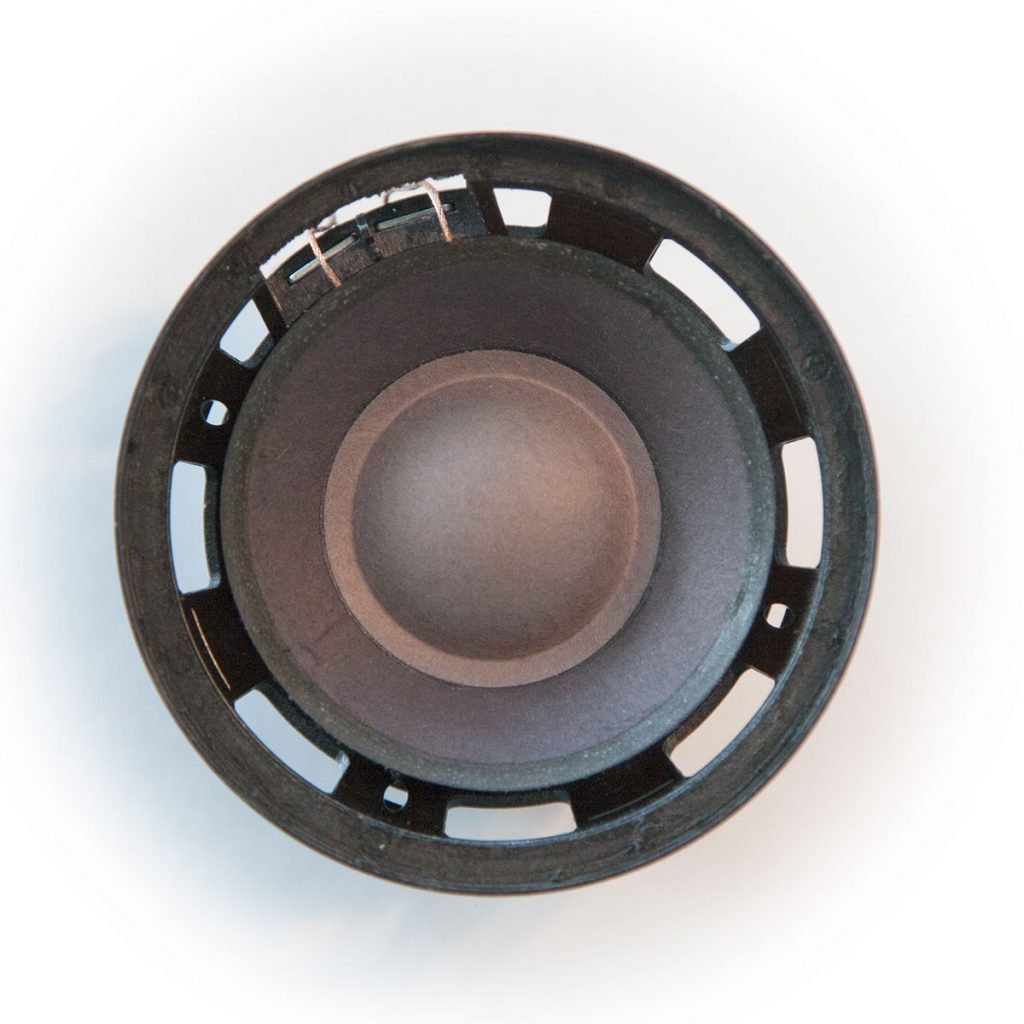
But there is one problem with this speaker: It’s midrange speakers use foam surround. From an acoustical standpoint, this material is a good choice. However, the problem is that the lifetime of foam surround is limited to 10-20 year. So almost any used Penta you can buy will need some work. Check out the picture on the right side. The foam of the lower surround is clearly defective, it is almost completely falling apart. But even the upper surround is not usable anymore. If you would touch it, you would notice that it simply feels like some kind of goo. Therefore ALL surrounds on the midranges needs to be replaced on this speaker.
Luckily replacing the foam surround isn’t very hard. This guide will show you how to do this.
Step 1: Get new foam surrounds
While there are lots of dealers that sell rubber surrounds, new every of them also offers foam surrounds. I got mine from speakerrepairshop.nl. They also explain why you should not replace foam surround with rubber surrounds: “Foam is in general more flexible than rubber, giving the woofer a slightly higher efficiency”.
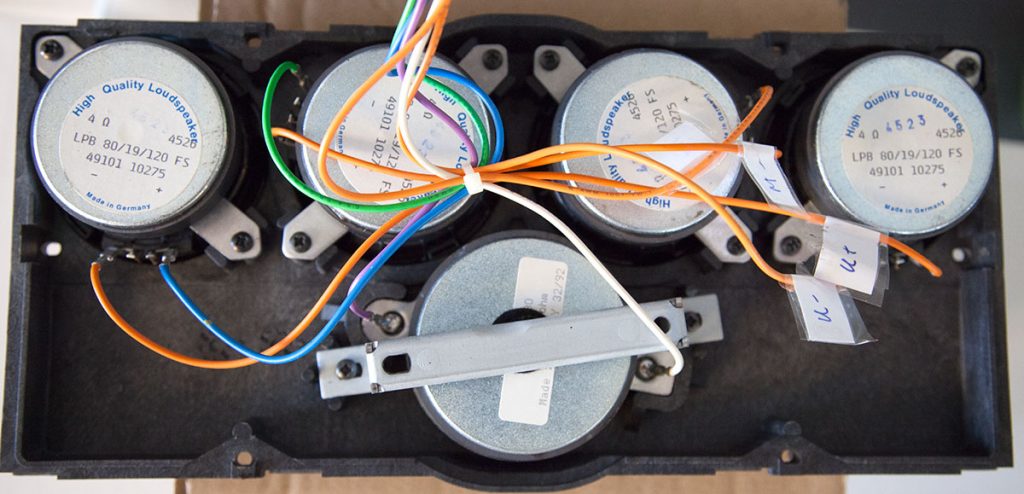
Step 2: Unmount all midrange speakers
First you need to remove the block with the tweeter and the 4 midrange speakers. There are a lot of cables connected to these speakers and some of them have the same color. I recommend to add labels to the cables to make sure you connect these correctly again after the repair.
Step 3: Remove old surrounds
With a knife it is easy to remove the old surrounds without damaging anything. Even better then using a knife is a small chisel. Parts of the foam surrounds might just fall apart when you touch them. That’s ok, we don’t need to them anymore. Make sure you remove all glue and clean the membrane and the chassis as got as you can.
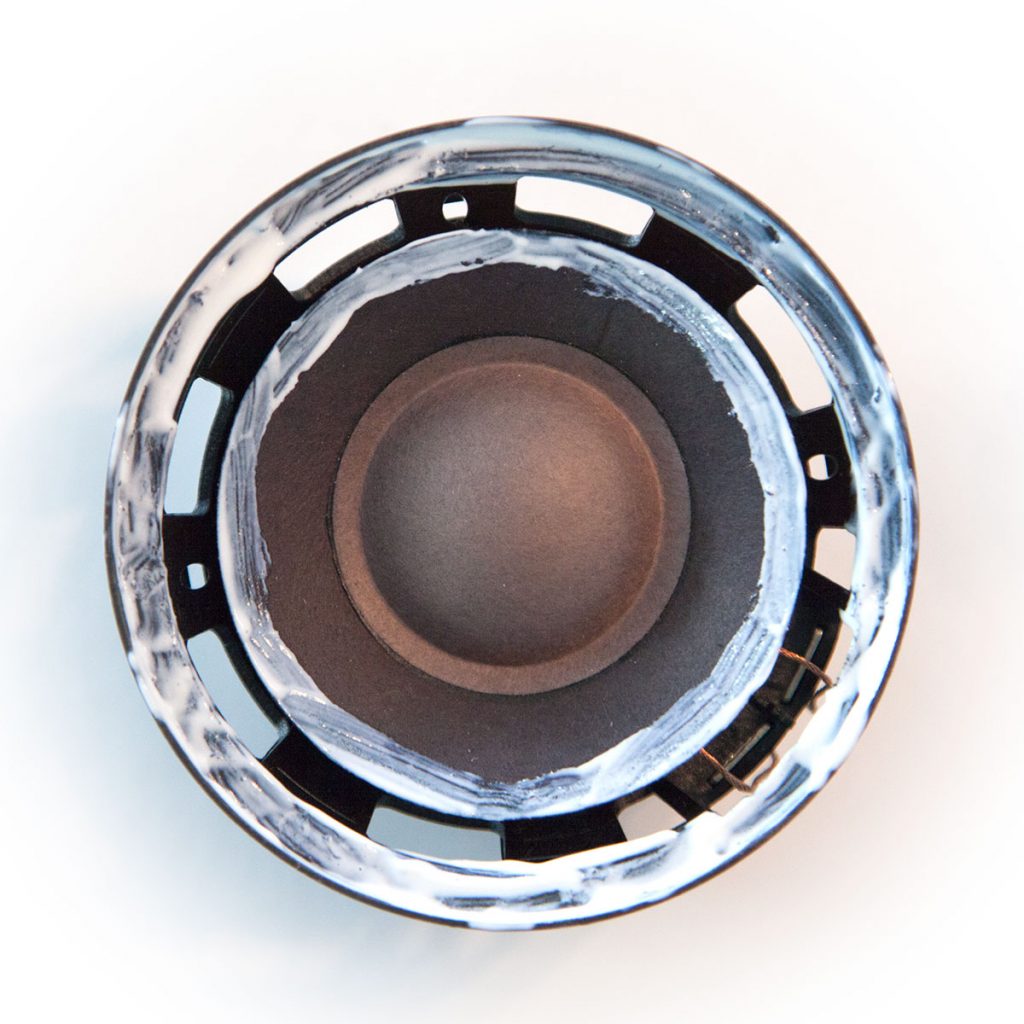
Step 4: Glue new surrounds
I recommend to add glue to the chassis and the new surrounds. Make sure you get glue that is specifically designed for this use case. Ideally buy if from the same company you buy the surrounds from. They should be able to recommend the right one.
Now you need to add the surround and put some pressure onto it. I used a drinking glass with the right diameter for this:

There might be a bit too much glue on the membrane. If it’s just a tiny bit, you don’t have to worry. It won’t have an impact on audio performance. And nobody will see it when you put on the speaker cover again.

Step 5: Mount everything and enjoy music
A Raspberry Pi with a HiFiBerry DAC+ is the ideal source for your Penta. You can use it to play music from all kinds of sources,
even from Bluetooth devices. Check out our software page to find out what software works best for your needs.