Converting an Old Radio Into a Spotify Streaming Box
Converting an Old Radio Into a Spotify Streaming Box
Guide by Pascal Krumme, originally published on instructables
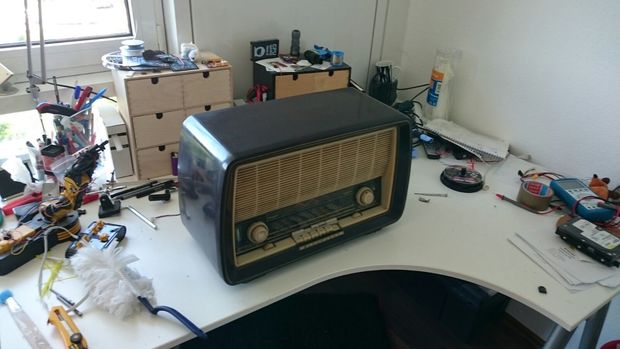
This project started about a year ago when I came across an old superhet valve radio on ebay. I didn´t had any useful application in mind when I bought it but as it was really cheap an in good condition I didn´t wasted that much thougths about it.
After some research and a few screws removed I collected some background information on the device I just bought:
Manufacturer: Blaupunkt
Model Name: Roma
Manufacturing Date: Between 1958 and 1959
Technology: Superhet vacuum tube radio
Luckily there was a sheet with the circuit diagram hidden inside the radio.
Step 1: Disassembly and Cleaning

As I realized the device I just got my hands on is close to 60 years old (which is far far older than I am) and spent approximately the last ten years in a dark basement it was obvious that I had a lot of work right in front of me.
In the next weeks I completly disassembled the radio, taking out the complete electronics compartment, and every screw I could find. I got rid of every cobweb, a lot of dead spiders and a tremendous amount of dust.
Step 2: Insert Magic Here…
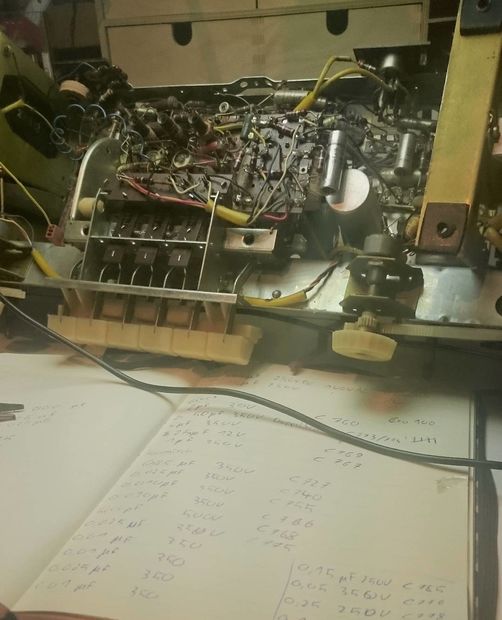
After cleaning all the mechanical parts I started researching about the electronics and inner workings of this radio. The circuit diagram came in pretty handy not only for understanding but also for identifiying potentially broken or worn-out parts.
I decided to replace all electrolytic capacitors and all capacitors made from tar and paper (yes they did it that way back then). Even the preparations where really time consuming as everything was hardwired and directly soldered together. So I went through the complete electronics compartment, searched for capacitor which needed replacement and tried to find them in the circuit diagram to get their value.
I came out of that with a list of about 30 capacitors which I then ordered at farnell/element14 (they where simply the only ones having all needed parts in stock).
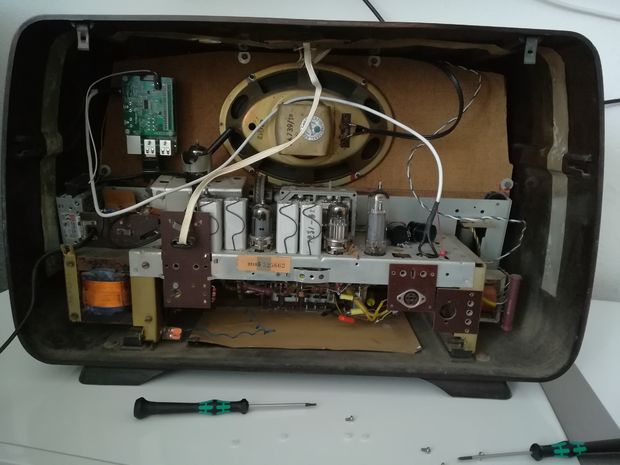
After installing all capacitors I was able to listen to radio stations in the UHF-Band.
Step 3: Excurse: Running Spotify Connect on a Raspberry Pi
During my work on the electronics I learned about the the line-in connector of the radio to attach external audio sources. I then decided to add a Spotify Connect receiver using a Raspberry Pi to the radio.
To install Spotify on a Raspberry Pi without a display attached. As there are no officially Spotify builds for Linux on ARM available (only for x86) I use the Exagear emulator from russian company Eltechs which you have to buy a licence for.
I will post an extra Instructable on how to run Spotify connect on a headless Raspberry Pi. But here are some keyfacts:
– Raspberry Pi runs Exagear x86 Emualator
– Emulator runs a Spotify Client on a virtual framebuffer
– Framebuffer is accessible via VNC over Ethernet
For detailed instruction see:
https://www.instructables.com/id/Setup-a-Raspberry…
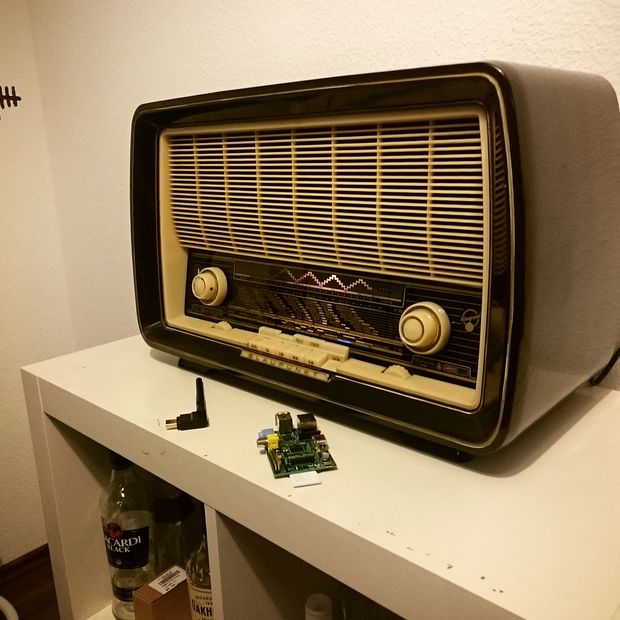
Step 4: Putting Everything Together
After removing the tremendous amounts of dust and dirt, replacing all the broken capacitors, and adding a new powercord. It was time to put everything together.
I decided to mount the Raspberry Pi in the top left corner, right on a piece of wood that holds the speaker in place.
The powersupply is a standard 5V 3A AC/DC Converter which are available for a few buck on amazon. The power wires are directly soldered to the live side of the power switch.
To improve the sound quality (which is really impressing regarding how old the radio is) I added a Hifiberry DAC which is definitly worth the money.
I also added a Wifi Stick I had lying around so I won´t need an Ethernet cable.
Step 5: Connecting the Audio Lines
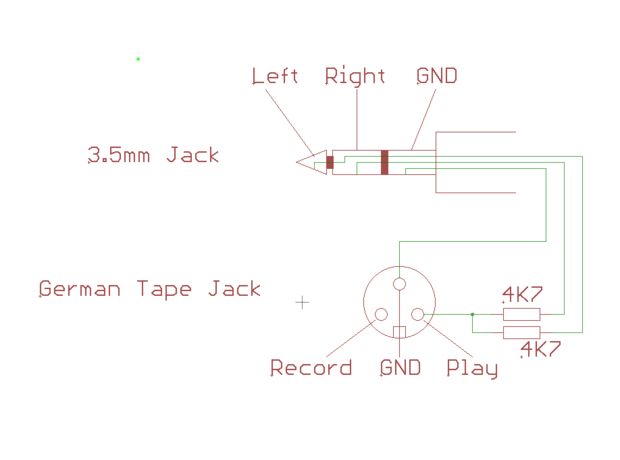
Connecting the Hifiberry to the radio is quite simple. The radio features a Audio Input which is basically compatible with standard audio output.
As the radio only has one mono channel you have to mix the stereo signal from the Pi with a resistor as shown in the picture.
I simply cut an old 3.5mm audio cable in half, added the required resistor and wrapped everything in heatshrink. After that I soldered the two loose ends directly to the back of the tape jack.
Step 6: Up and Running
It works!
Quick demo of the complete System, first you can hear a local radio station, then I switch to Spotify. It felt kinda weird to play music that is older than me on a device older than the music.
Total time from getting the radio to finishing this instructable was about a year. At first I did not have the Hifiberry installed but the sound quality was quite unsatisfying.