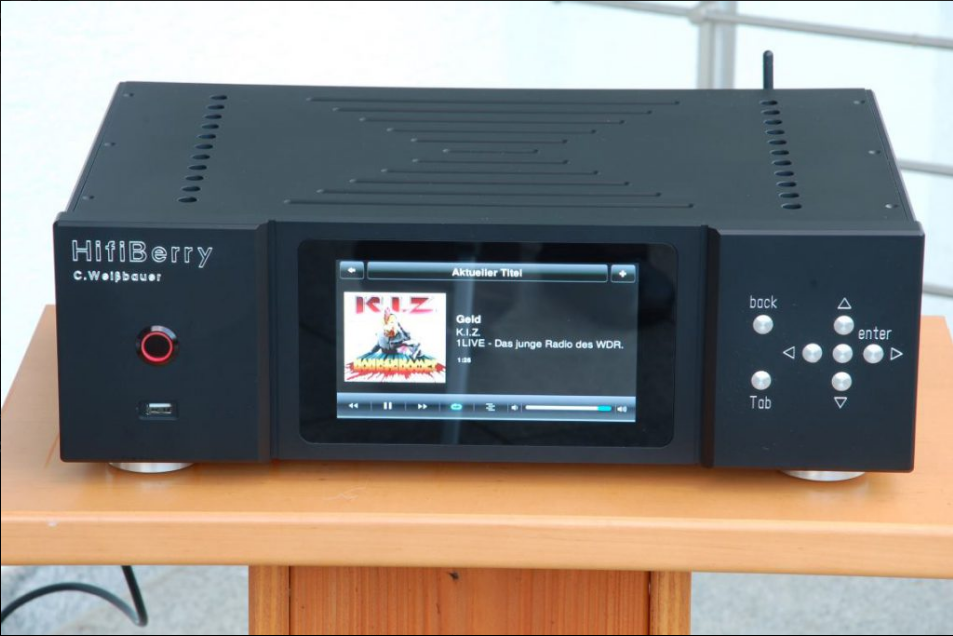
HifiBerry streamer in a classic audio case
HifiBerry streamer in a classic audio case
The tutorial was originally published on the Max2Play Website.
The following points emerged as must-haves for the DIY project:
- Naturally, the highest possible audio quality
- The control should be possible physically on the streamer, even without a tablet
- Clear and legible display with title information and cover art
- Standard width for stereos of 43,5 cm
Sound Optimization
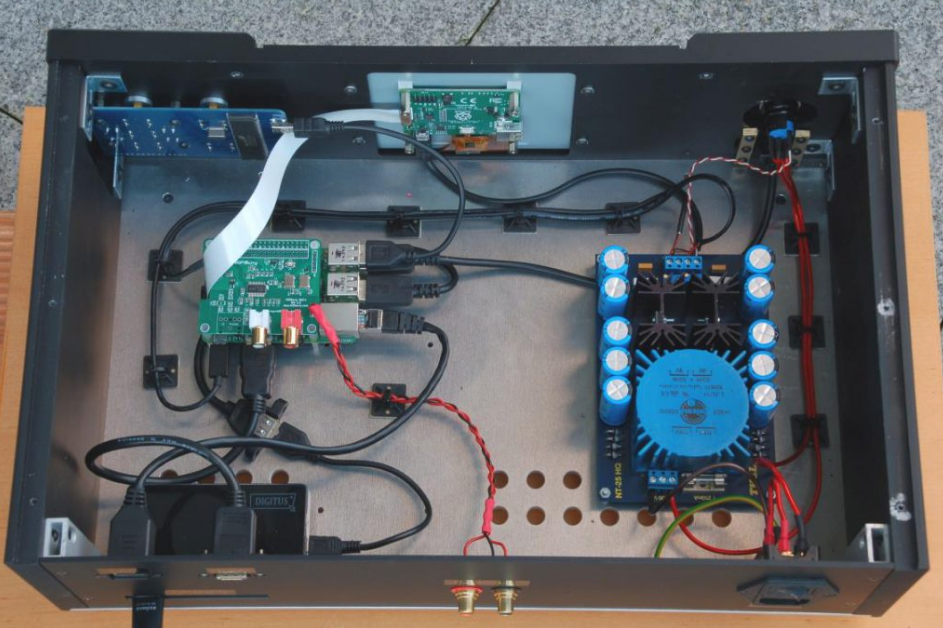
We made some test setups and finally settled on three modifications on the hardware side that can influence the audio quality especially positively.
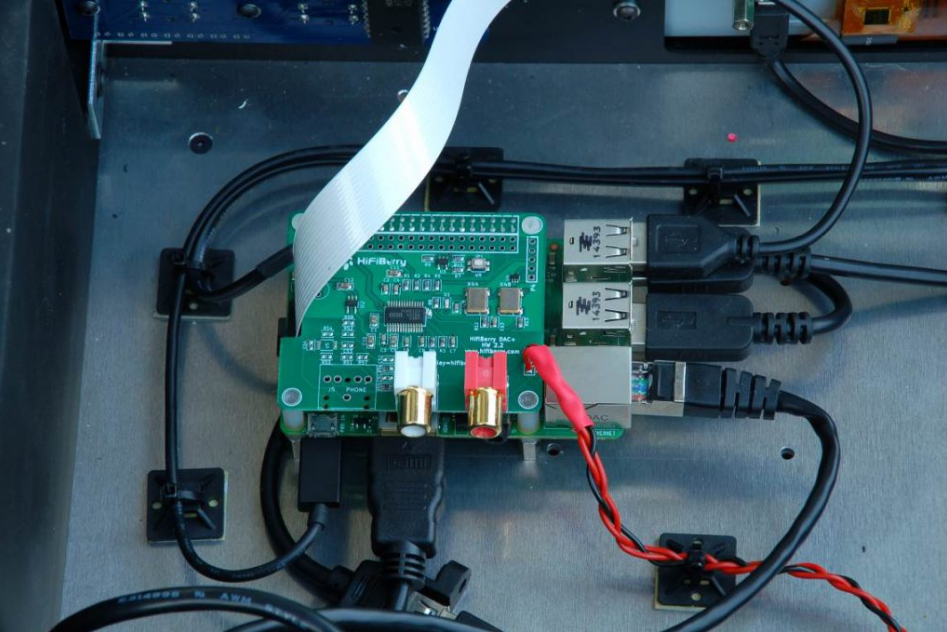
1.1. Splitting of the power supply for the DAC for converter and output section
For this, the HiFiBerry board’s resistor responsible for the output section is removed and instead the power is locally added separately. Sounds complicated, but it’s not! A detailed tutorial can be found in the HiFiBerry forums.
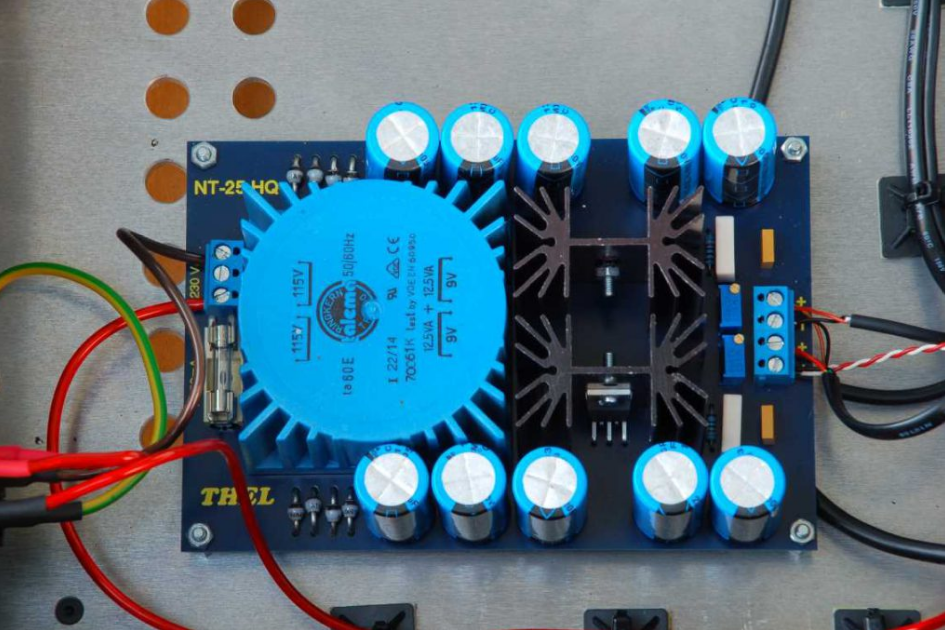
1.2. The most significant factor are the power supplies
While a simple outlet power supply makes the treble sound relatively sharp and its contures uneven, a quality mains supply can immediately offer improvement.
My choice was the double supply by Thel Audioworld, since I have had very positive experiences with Thel products in other projects. One half of the supply powers all digital components while the second is exclusively for the output level of the HiFiBerry DAC.
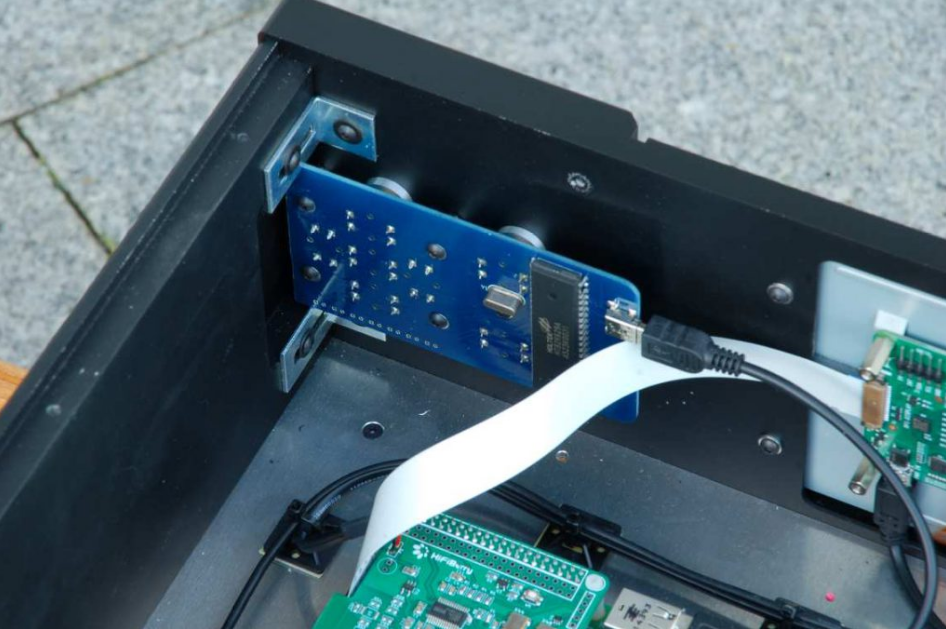
1.3. The third step shields the DAC from interpersals from the Pi
Either through spatial splitting, by connecting the GPIO’s of the Pi and DAC with cable or with a shielding plate. I currently use a piece of transformer plate that is electrically isolated by Plexiglas on both sides and connected to a mass.
The keyboard module is made by Audiophonics from France and works out of the box without any drivers. I removed the volume control buttons since I want to leave this task to the volume control of my amplifier.
Software Configuration
On the software side, I started with the Max2Play image for HiFiBerry sound cards, downloaded it, burn it on the SD card with the Win32DiskImager, connected the network cable, booted, checked the IP in my router and then accessed the web interface from a browser using the IP in the URL bar.
The updates were made and the missing plugins installed.
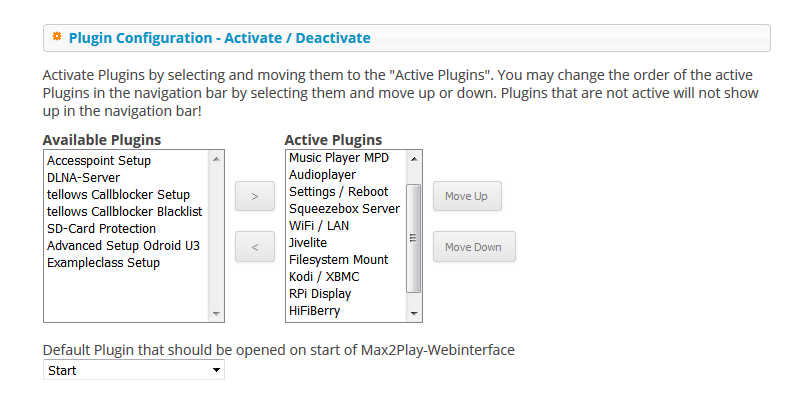
2.1. Configure the display
After the basic settings, device name and WiFi, were made, I went to configuring the display.
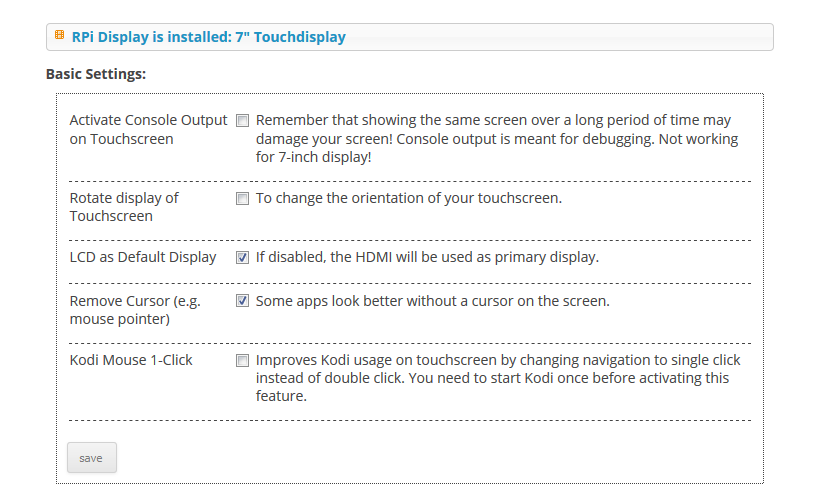
Click the menu item “RpiDisplay“, select the 7“-Display and in the main settings activate the following two points.
Now the display is configured so that the title is automatically displayed and the player can be controlled from the touchscreen. For this, we need to head over to the menu “Jivelite”, activate the autostart and install the Joggler skin for 7″ displays, save and reboot the Pi.
First I had to look for the setting that automatically selects and displays the right skin. Just go to the display options in the Jivelite interface and set the screensaver to “Now playing views -> artwork and text”.
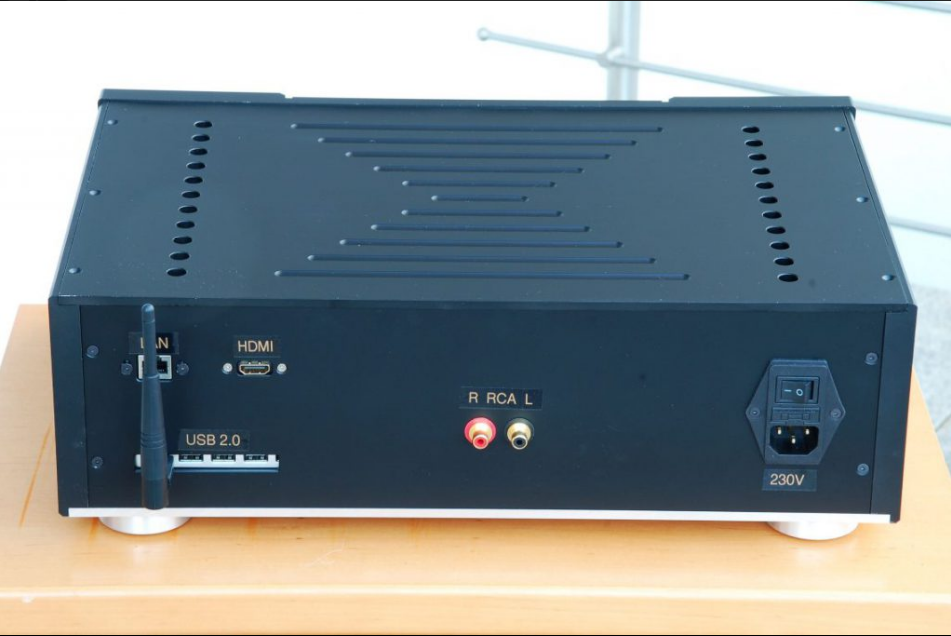
2.2. The audio output
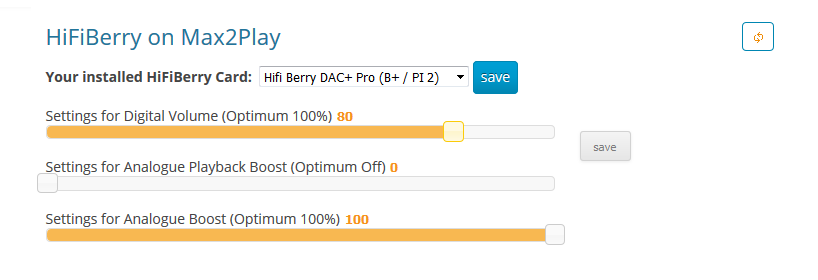
Now select the menu item “HiFiBerry“, select the used HiFiBerry DAC, save and reboot.
As our preferred setup, we select “advanced” and then click “Select this setup!”.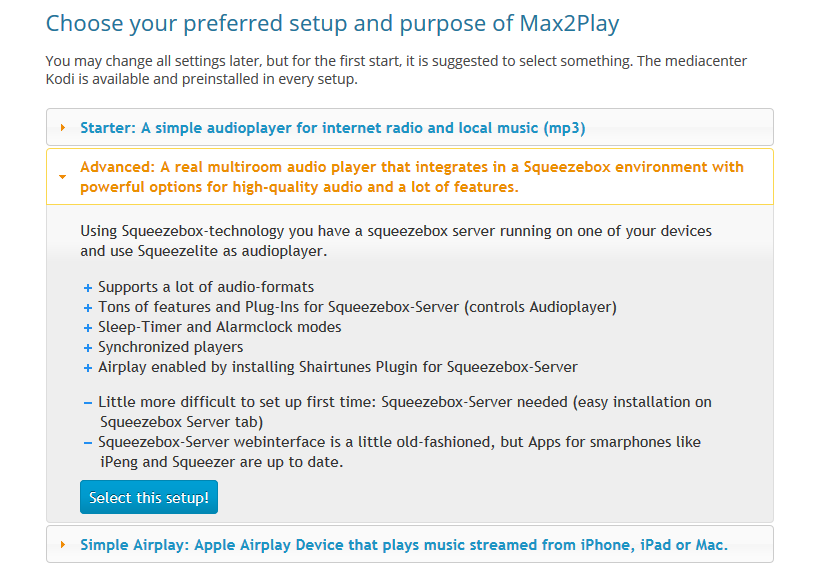
Now we set the Digital Volume to 85%, Analogue Playback Boost to 0% and the Analogue Boost to 100%. With too high values on the Digital Volume, unfortunately, the DAC tends overmodulate. However, it does make sense to play around a little with this controller to find out the value for optimal individual output.
 2.2. The volume
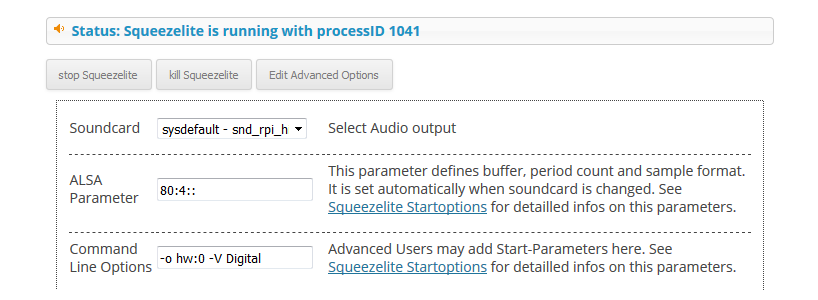
In the final step, we select the menu item “Audioplayer“ and edit the advanced options of the media player Squeezelite. There, you can check whether HiFiBerry is selected as the sound card and add the commandline option “-o hw:0 -V Digital“. This results in the volume only being manipulated by the hardwaremixer and by any software.
I hope this can be helpful, especially for beginners, as a little guideline on how to get started.
If you are interested in further information you can also visit my homepage.
audiophile greetings
Whity
If you are interested in this case or a similar solution for your HiFi project, you can contact Whity at