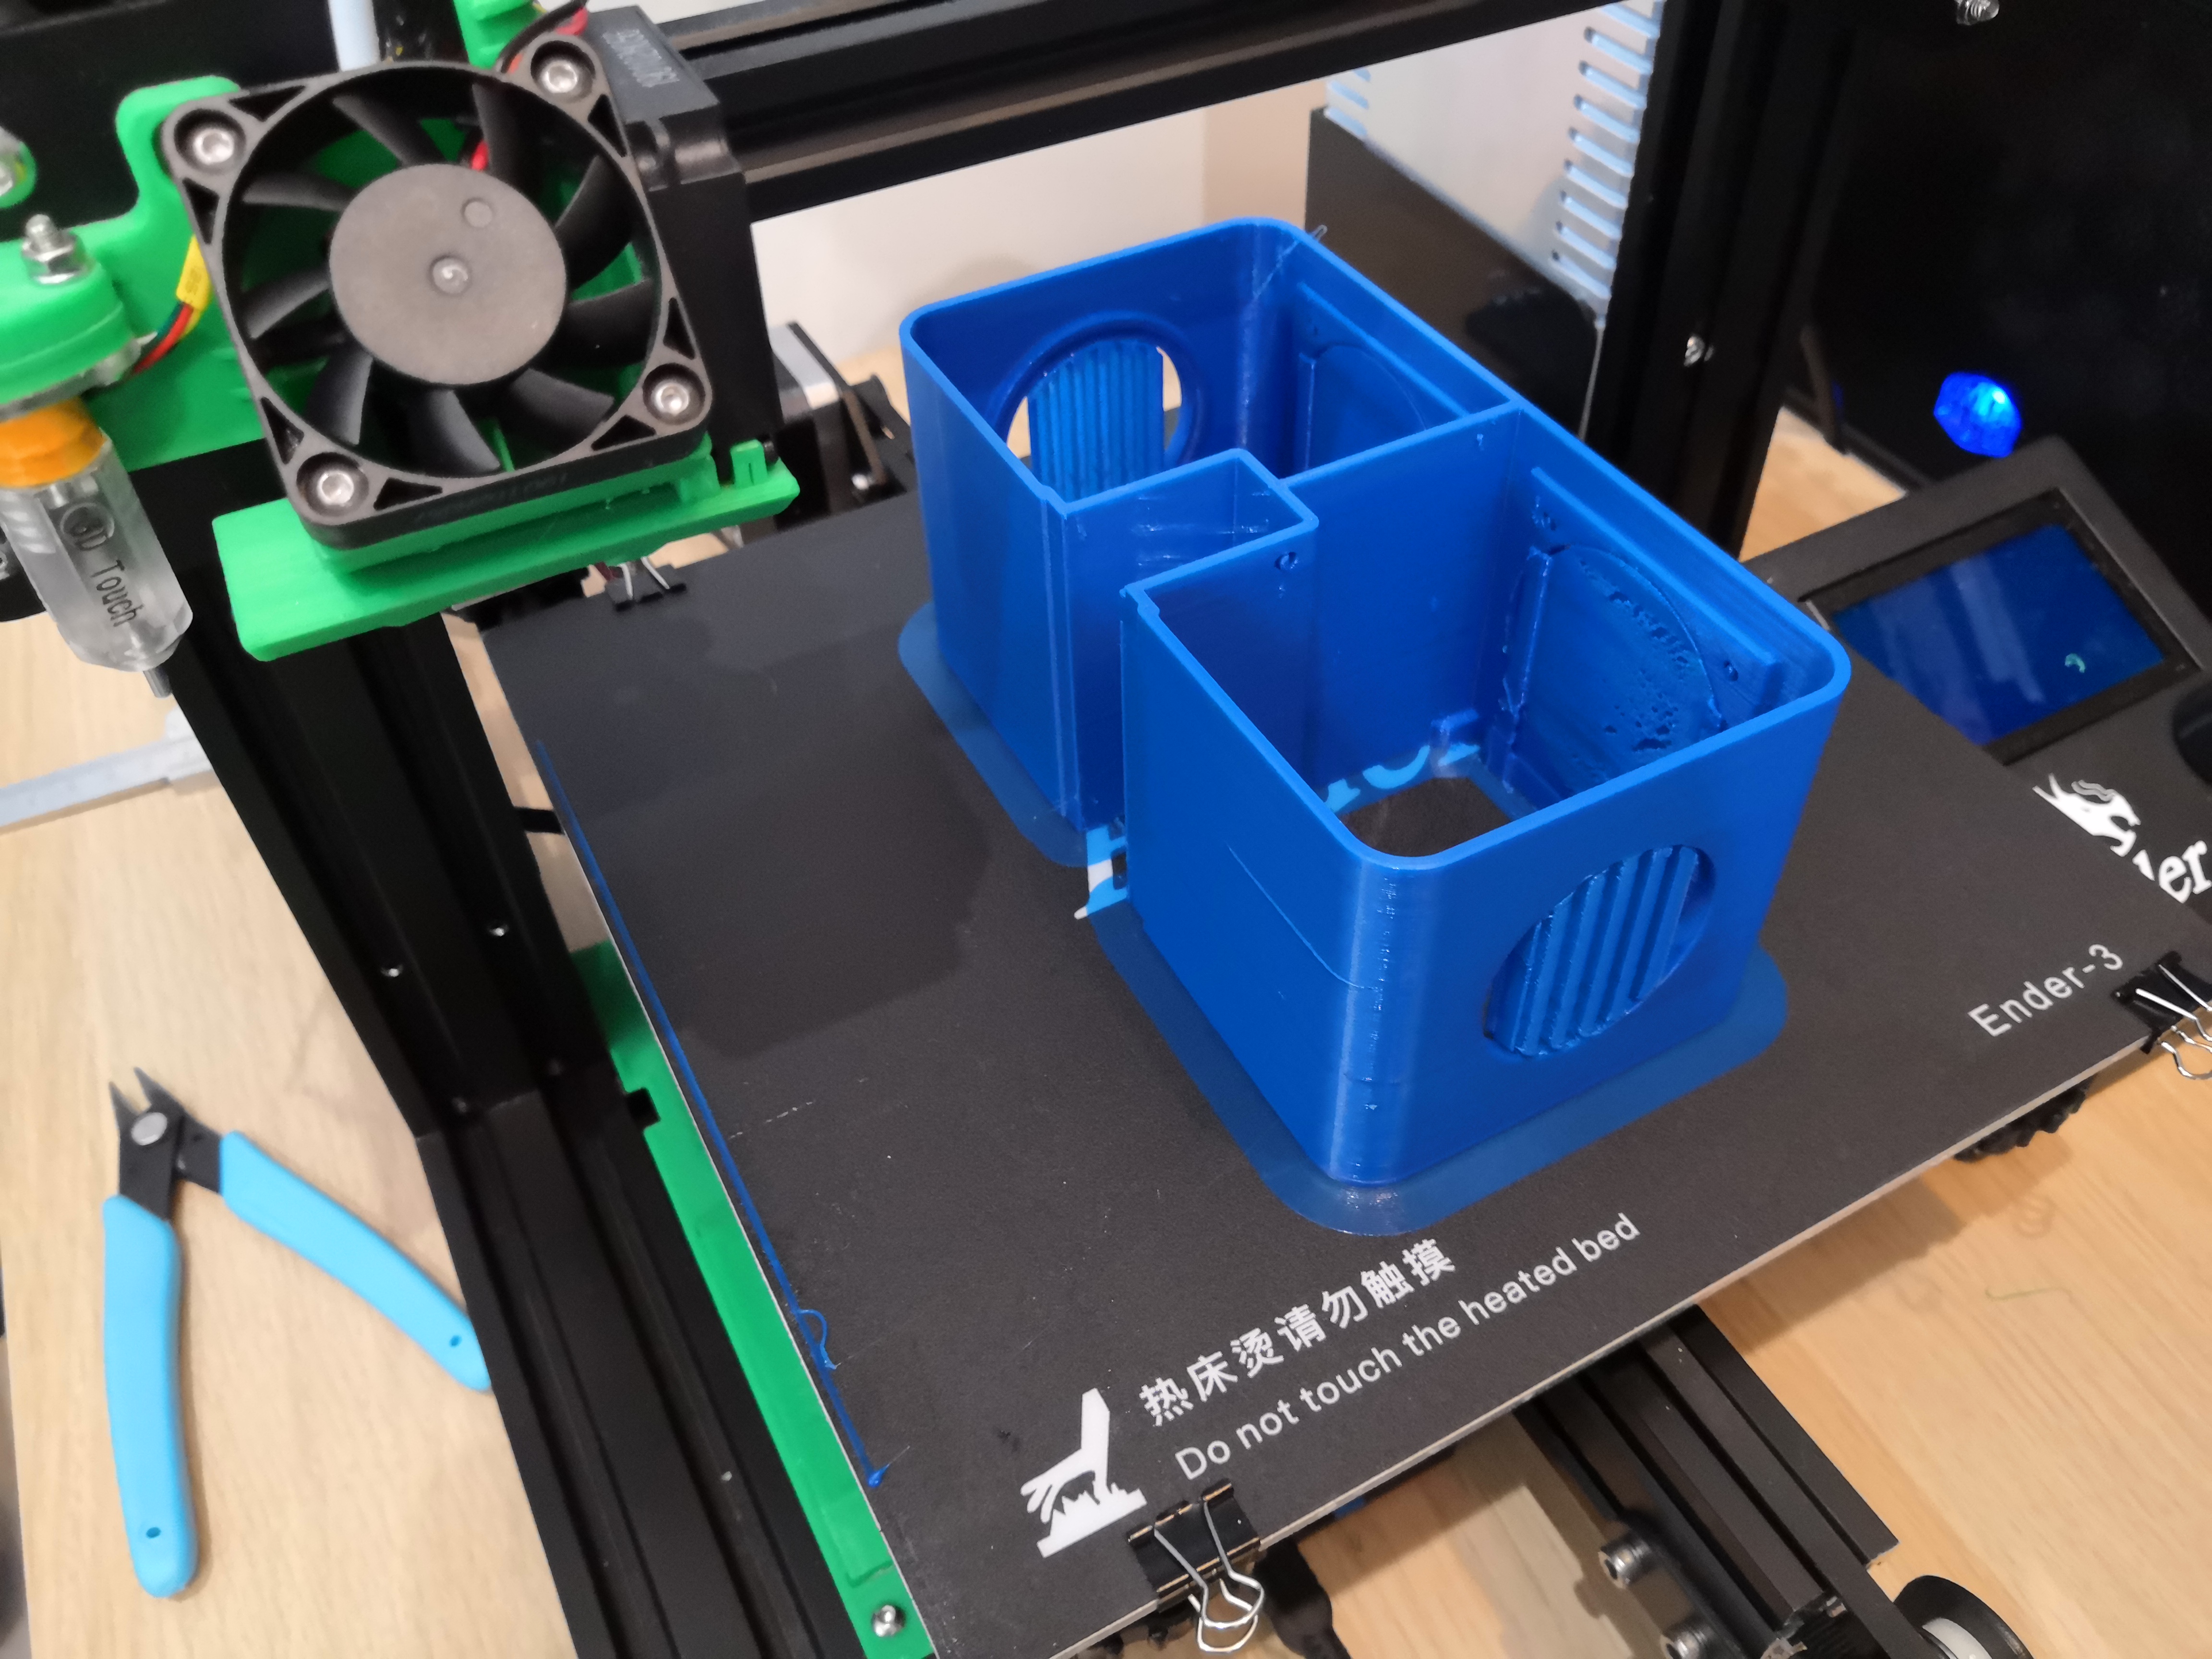
Childbox
Childbox
Creator: Andrey Gorkovenko
Download the files:
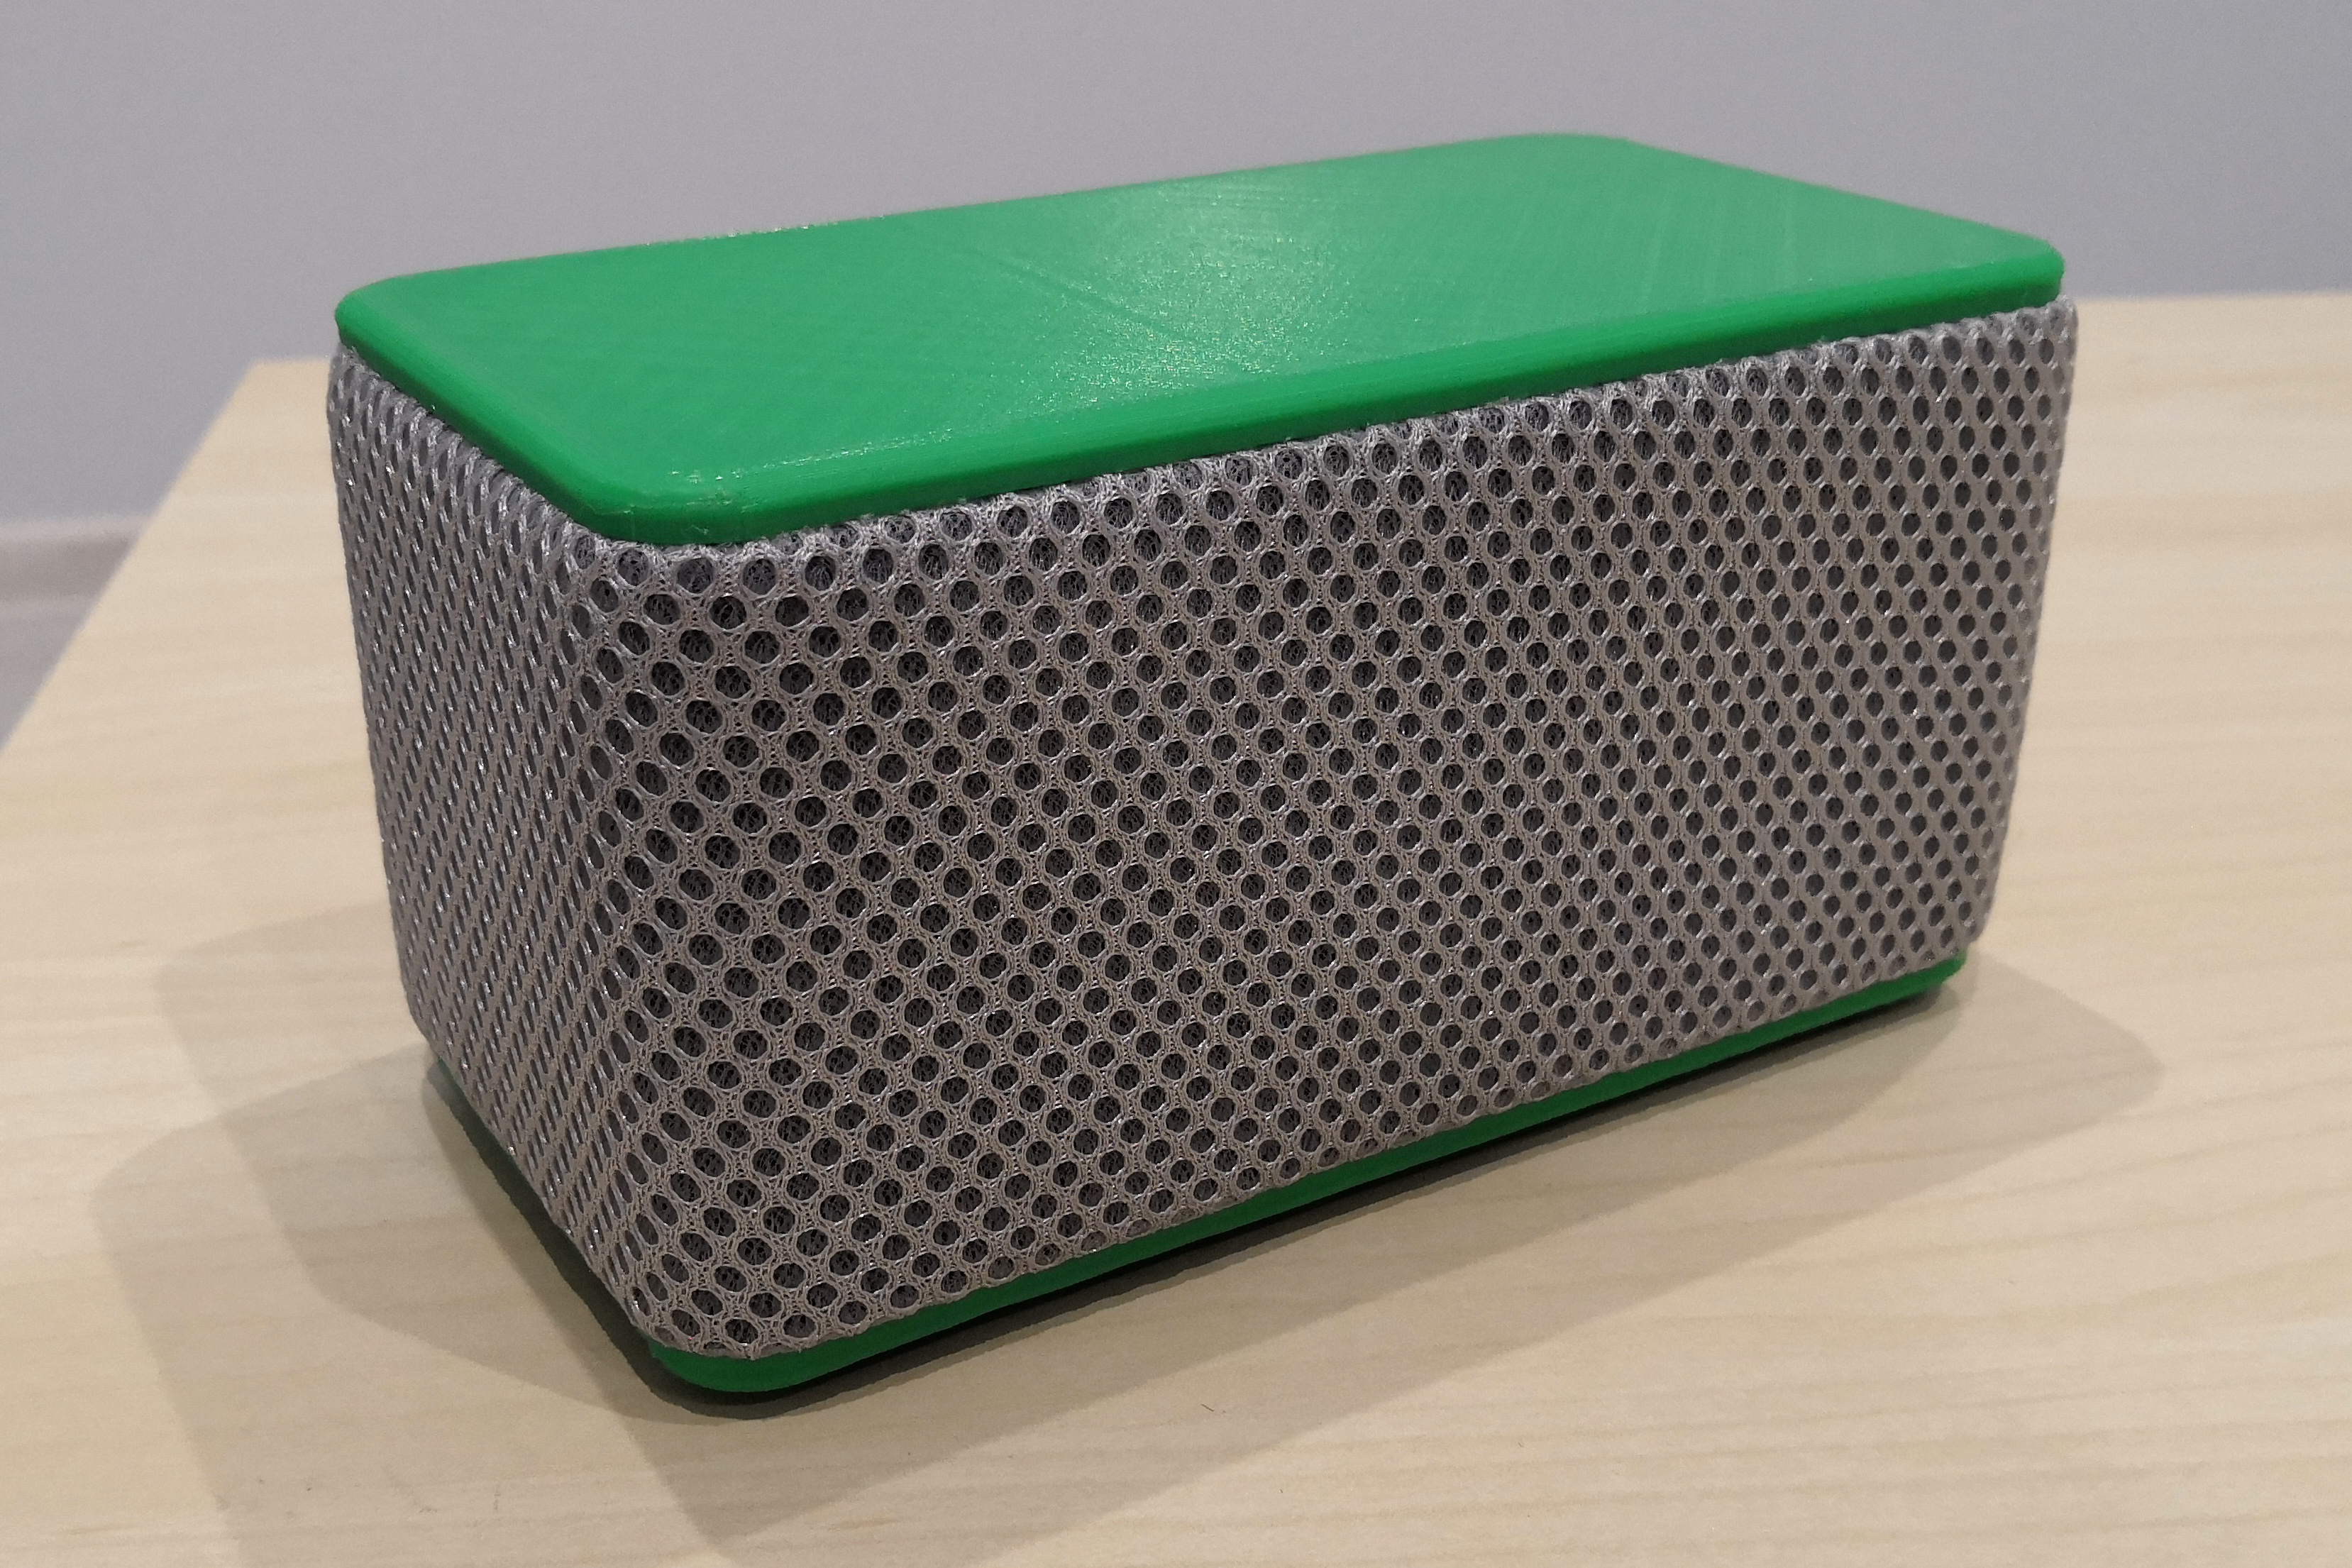
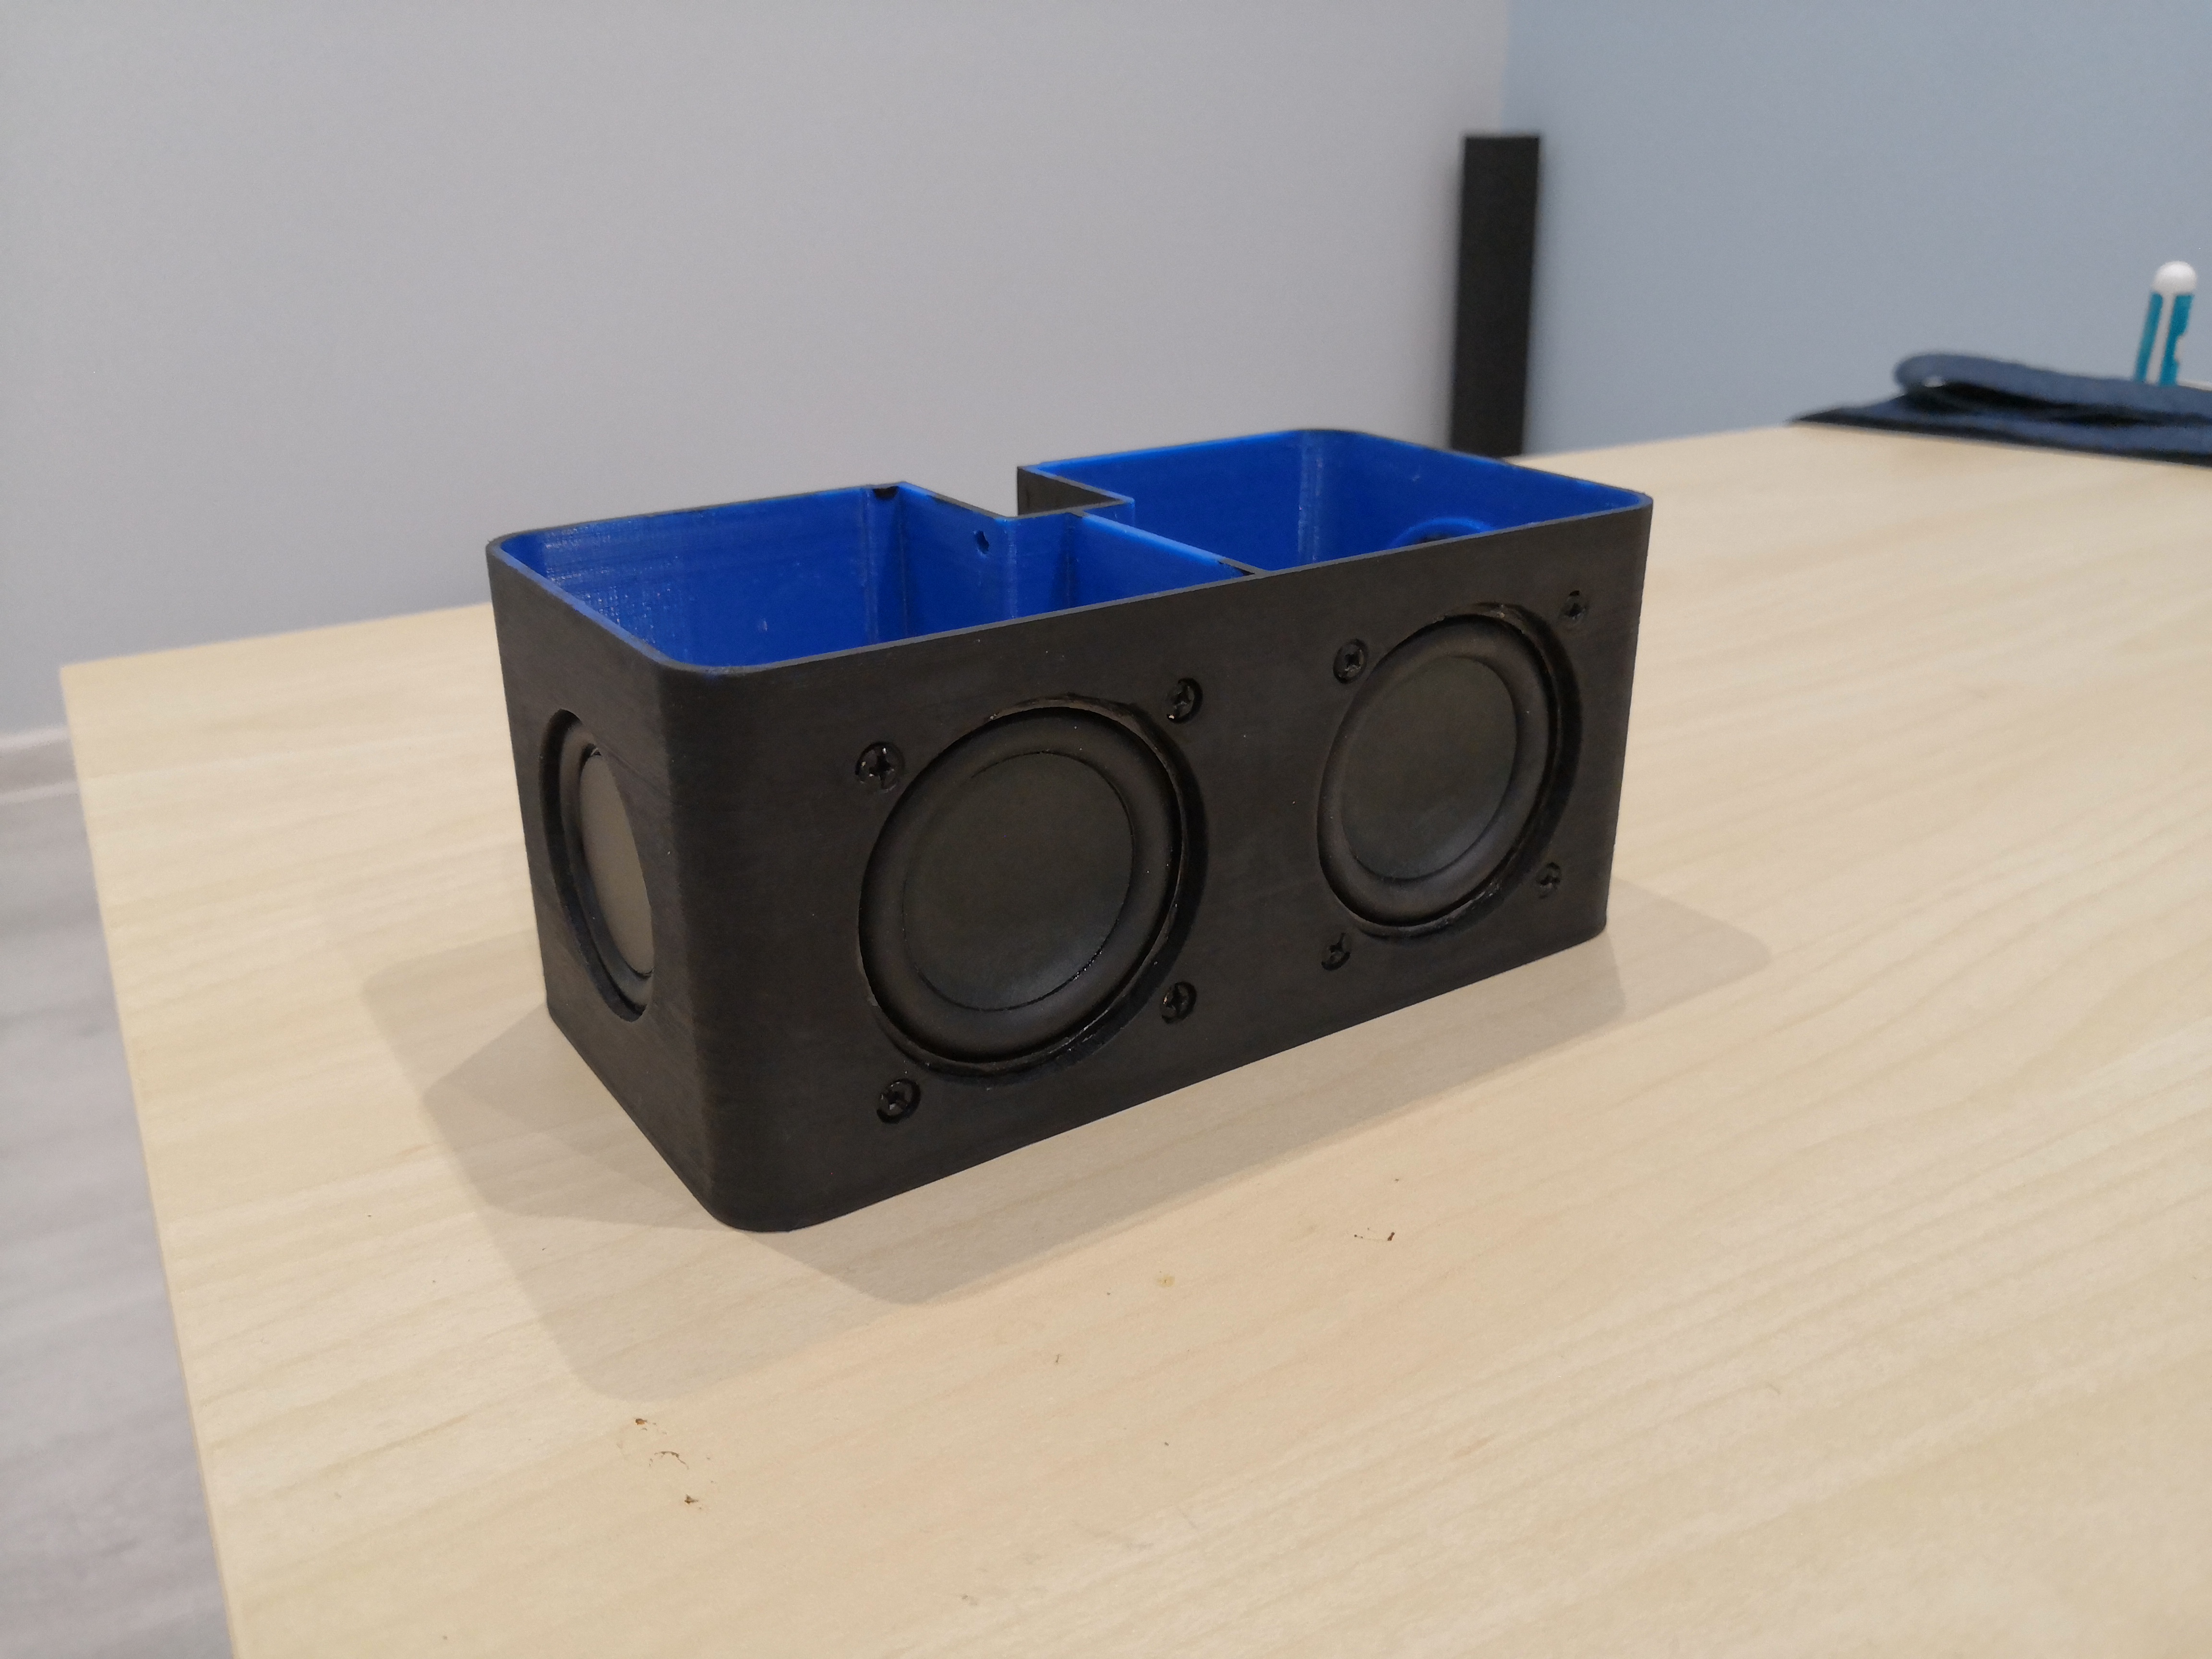
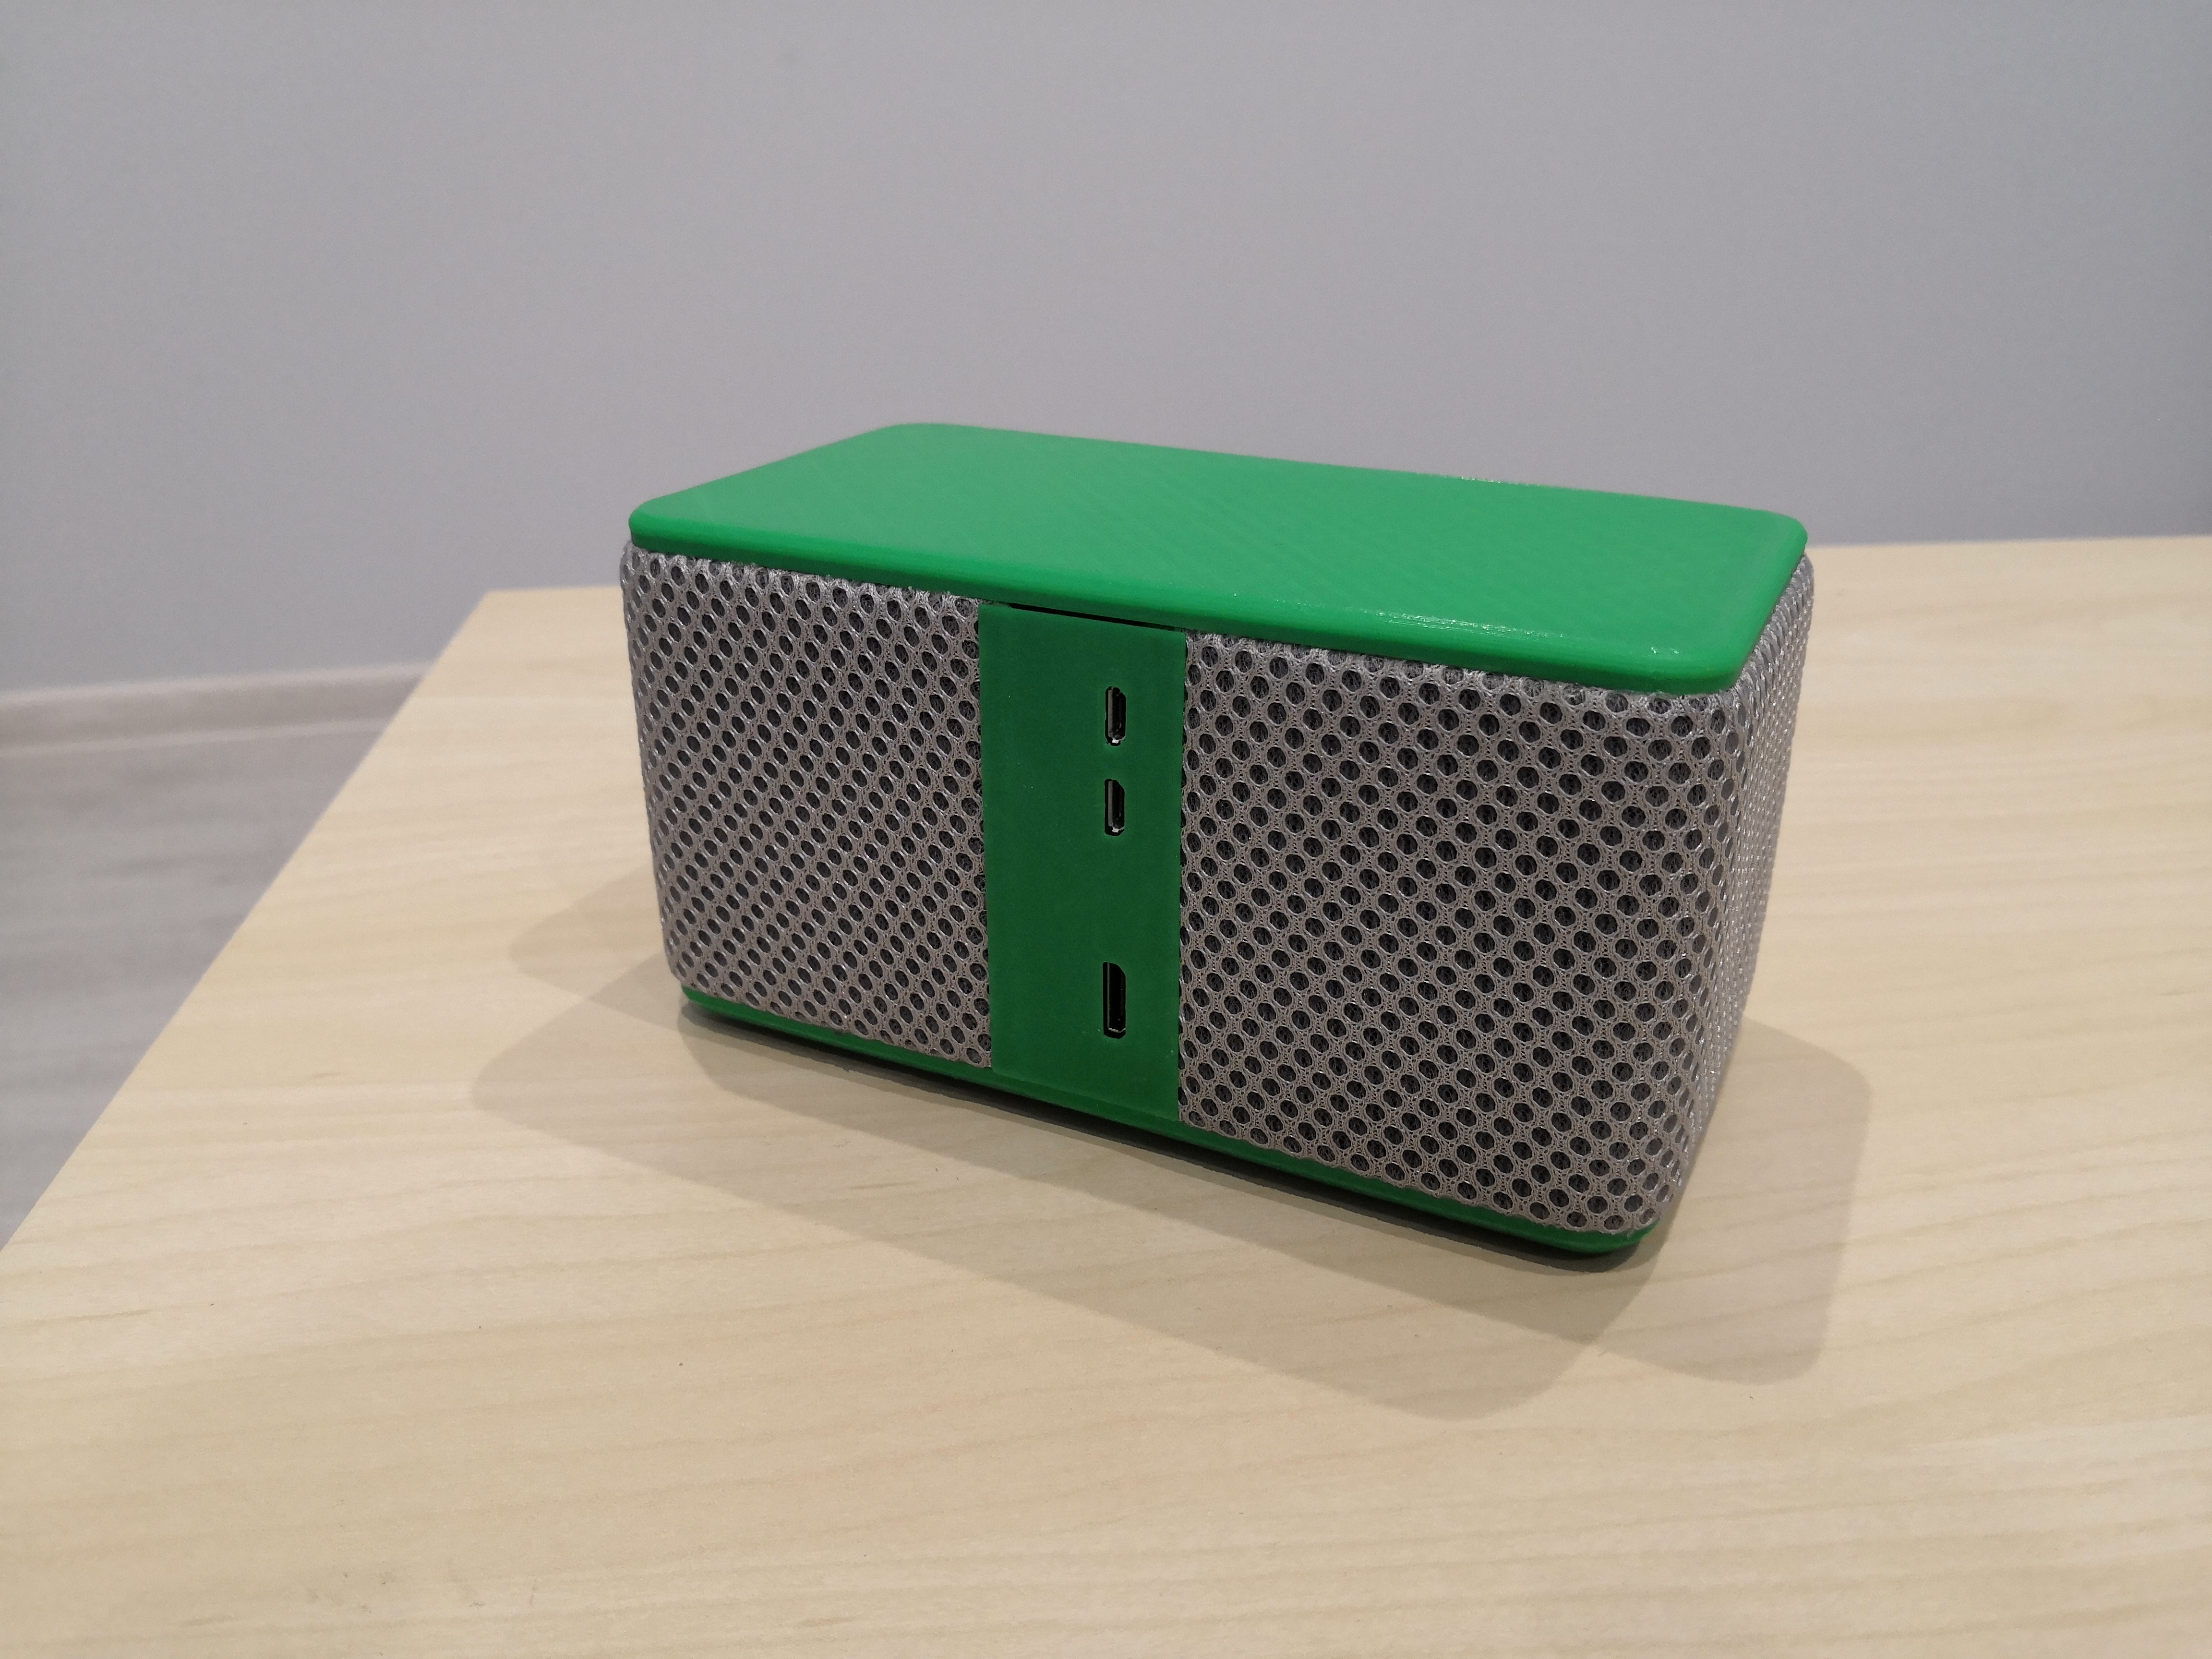
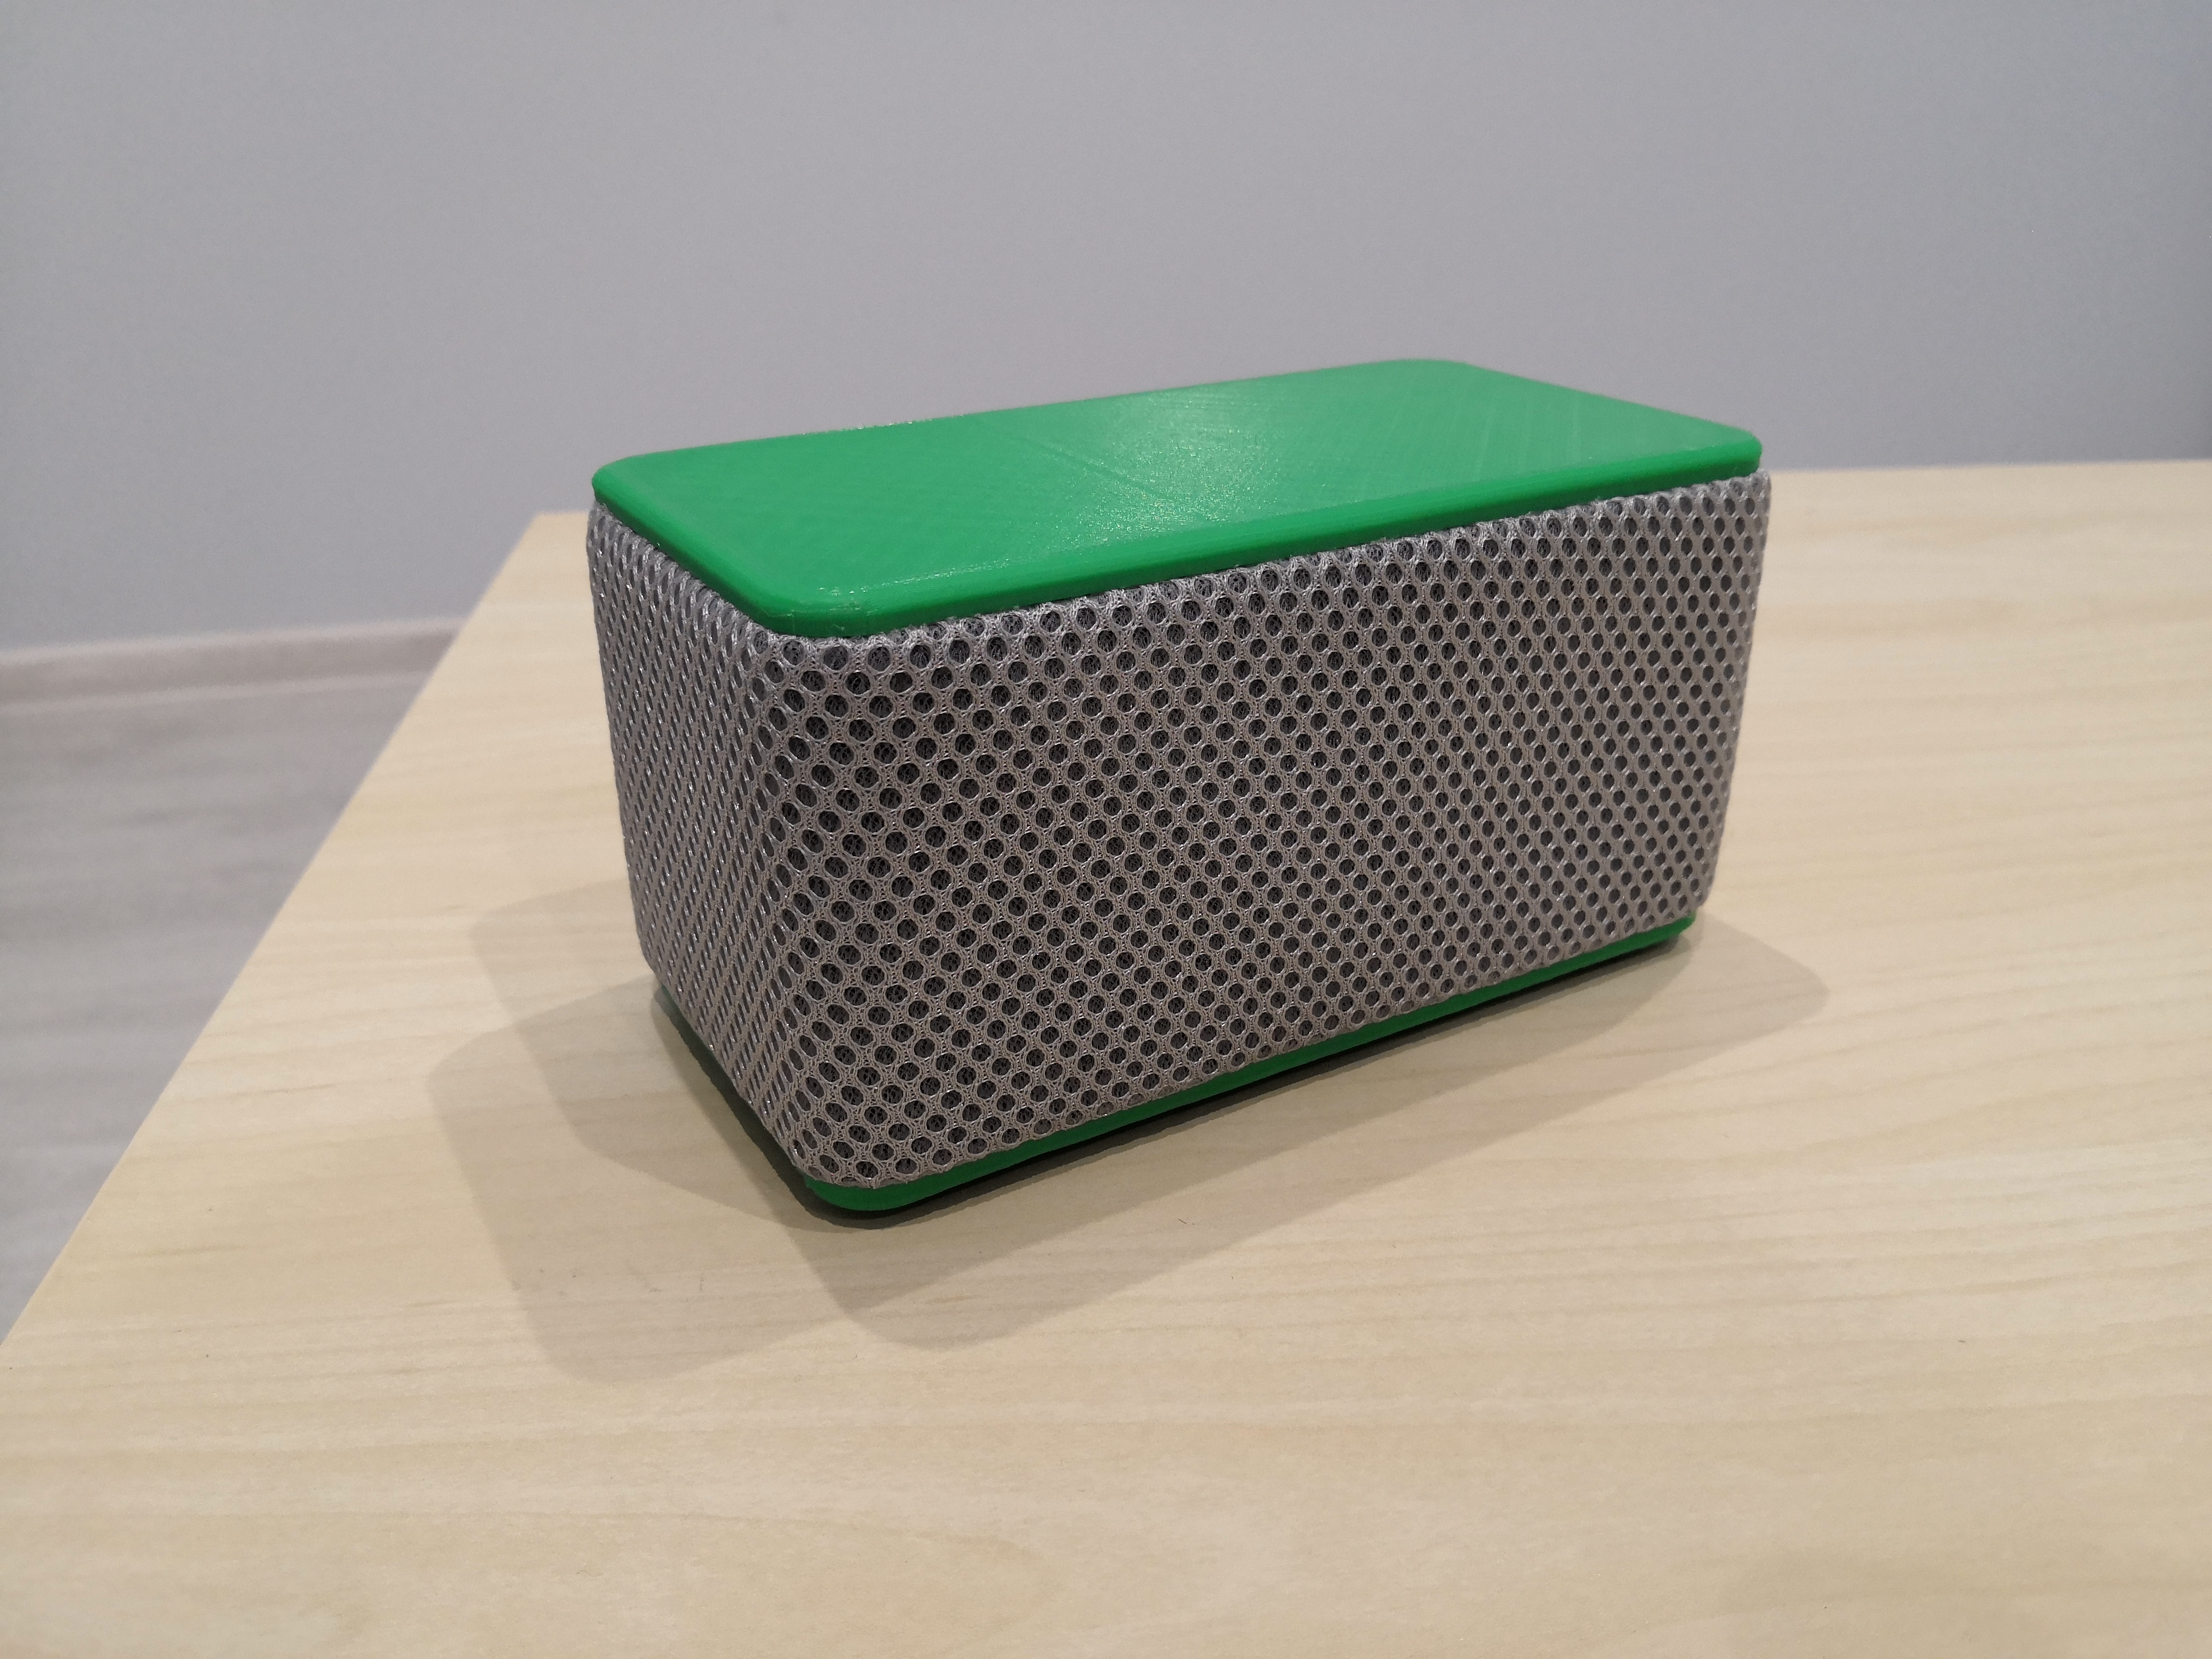
Dimensions: 155mm(L) x 80mm(W) x 80mm(H)
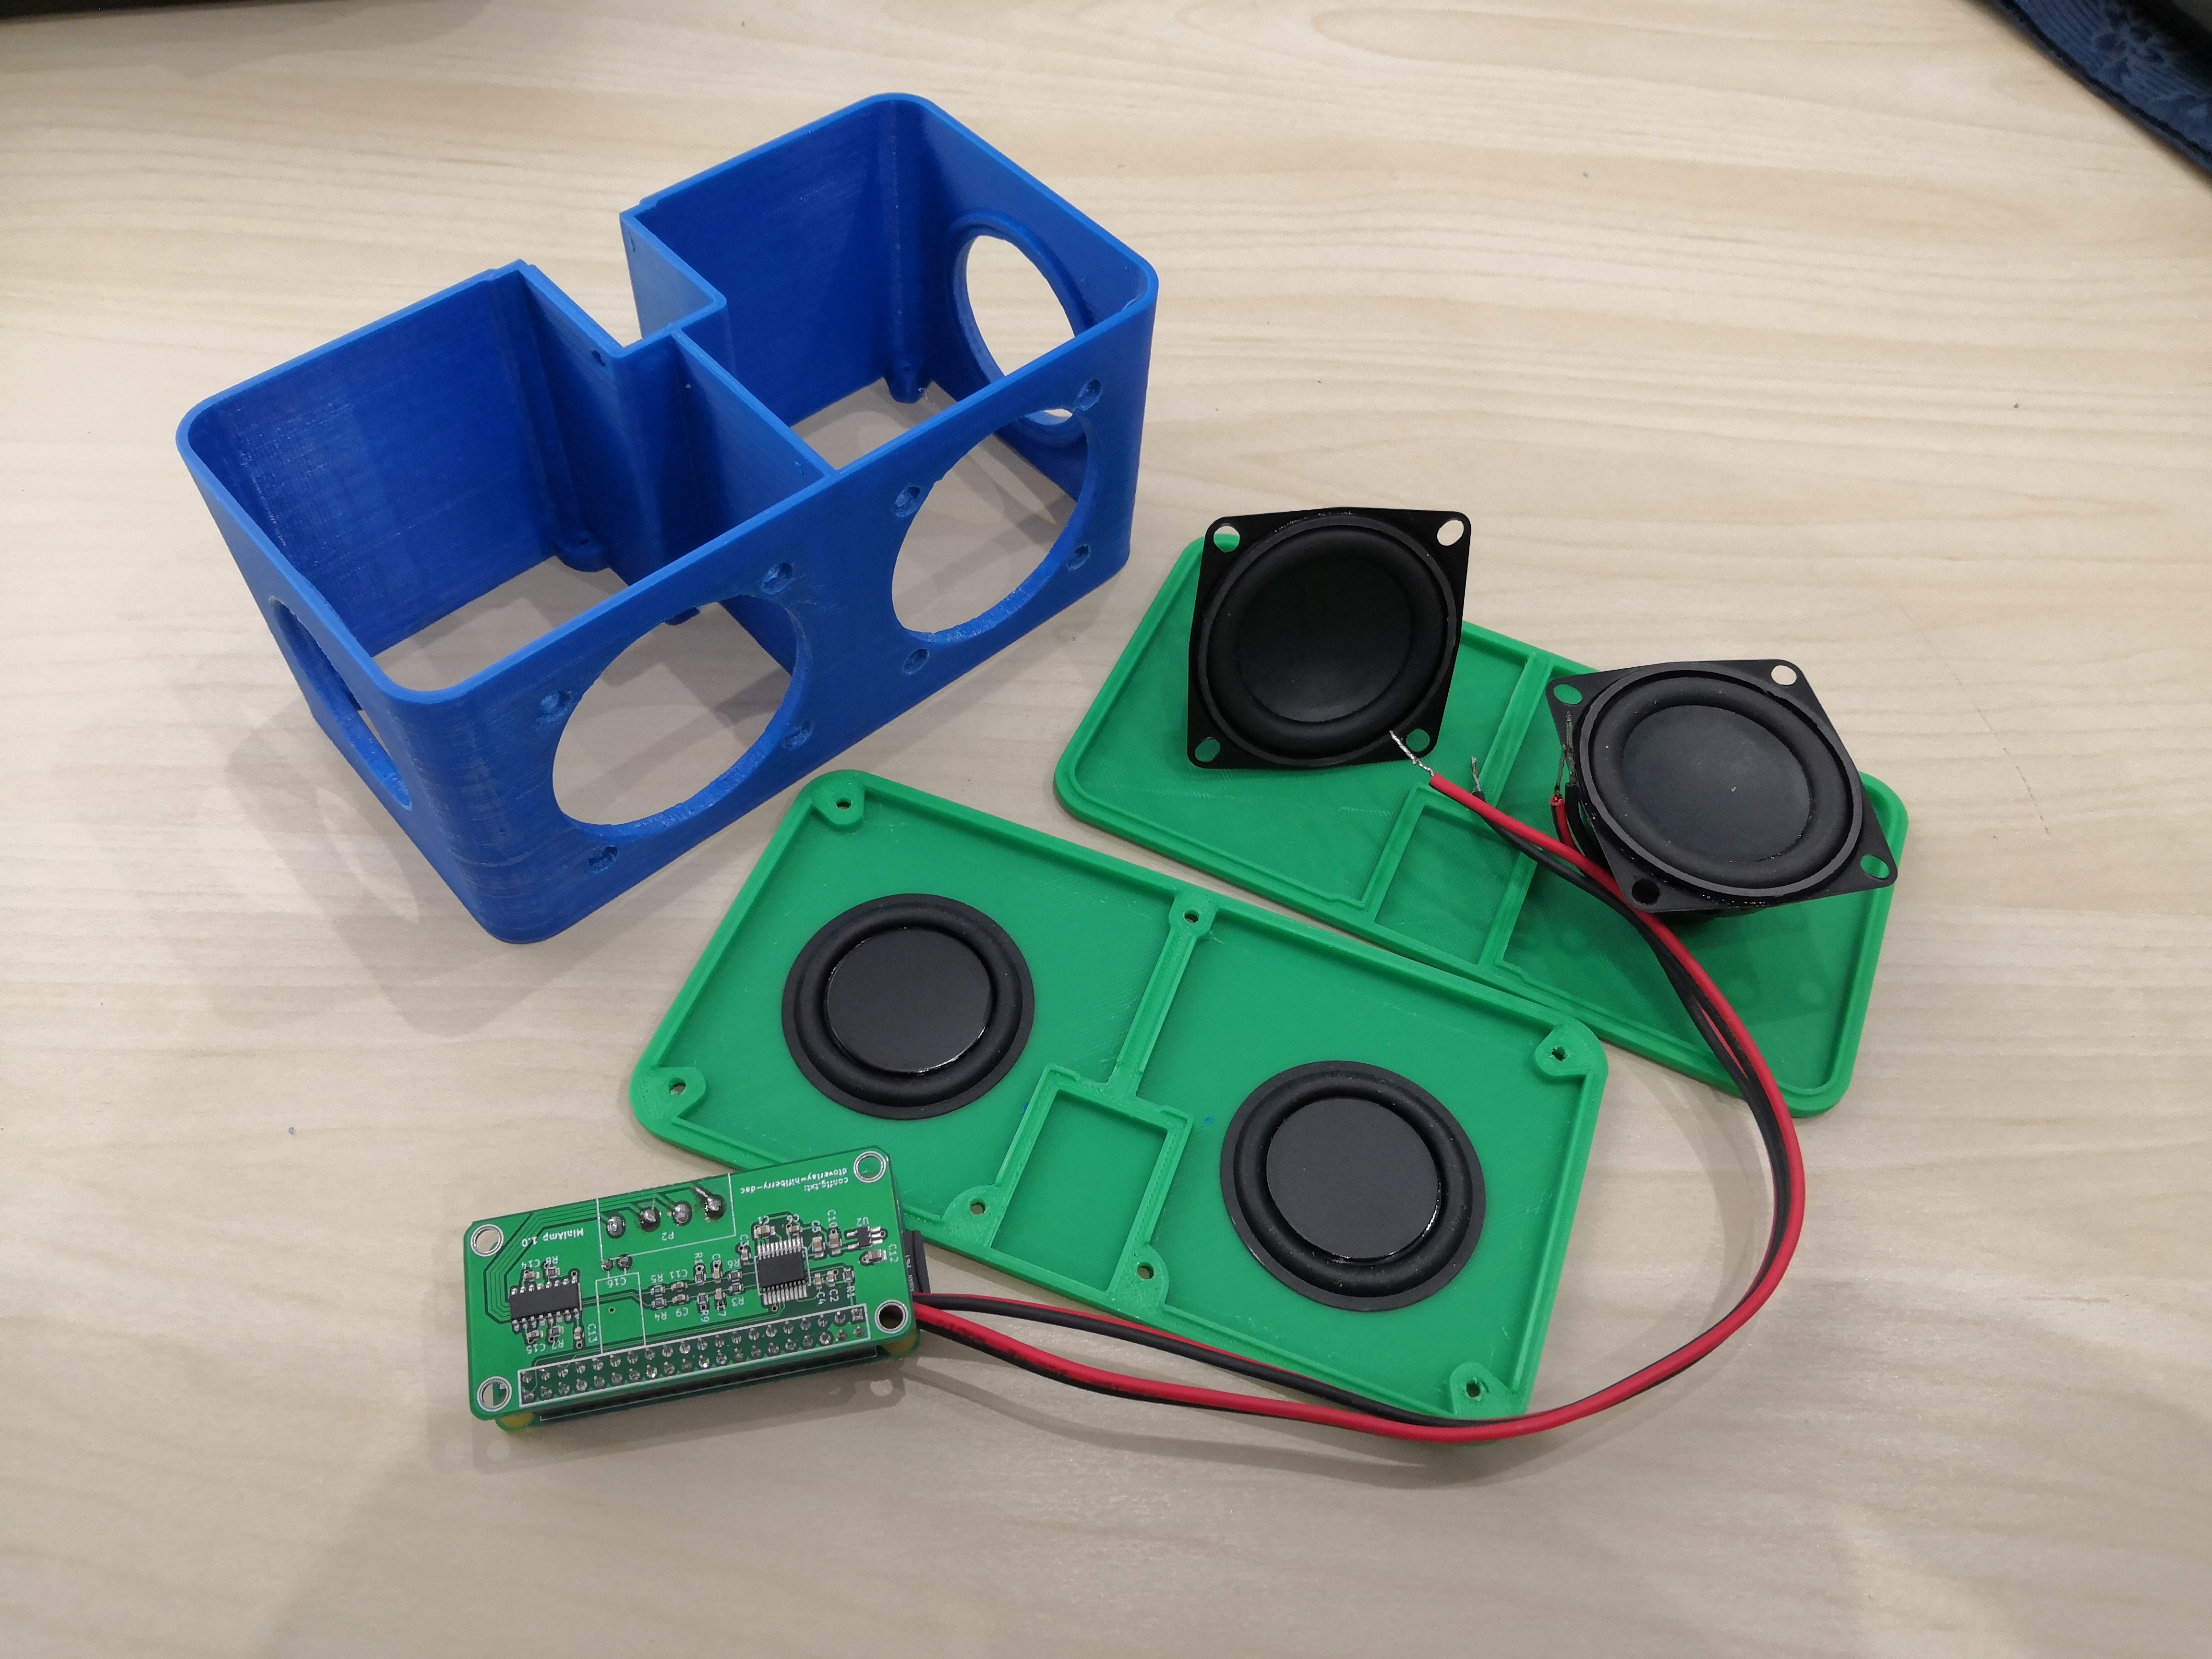
This project requires following hardware:
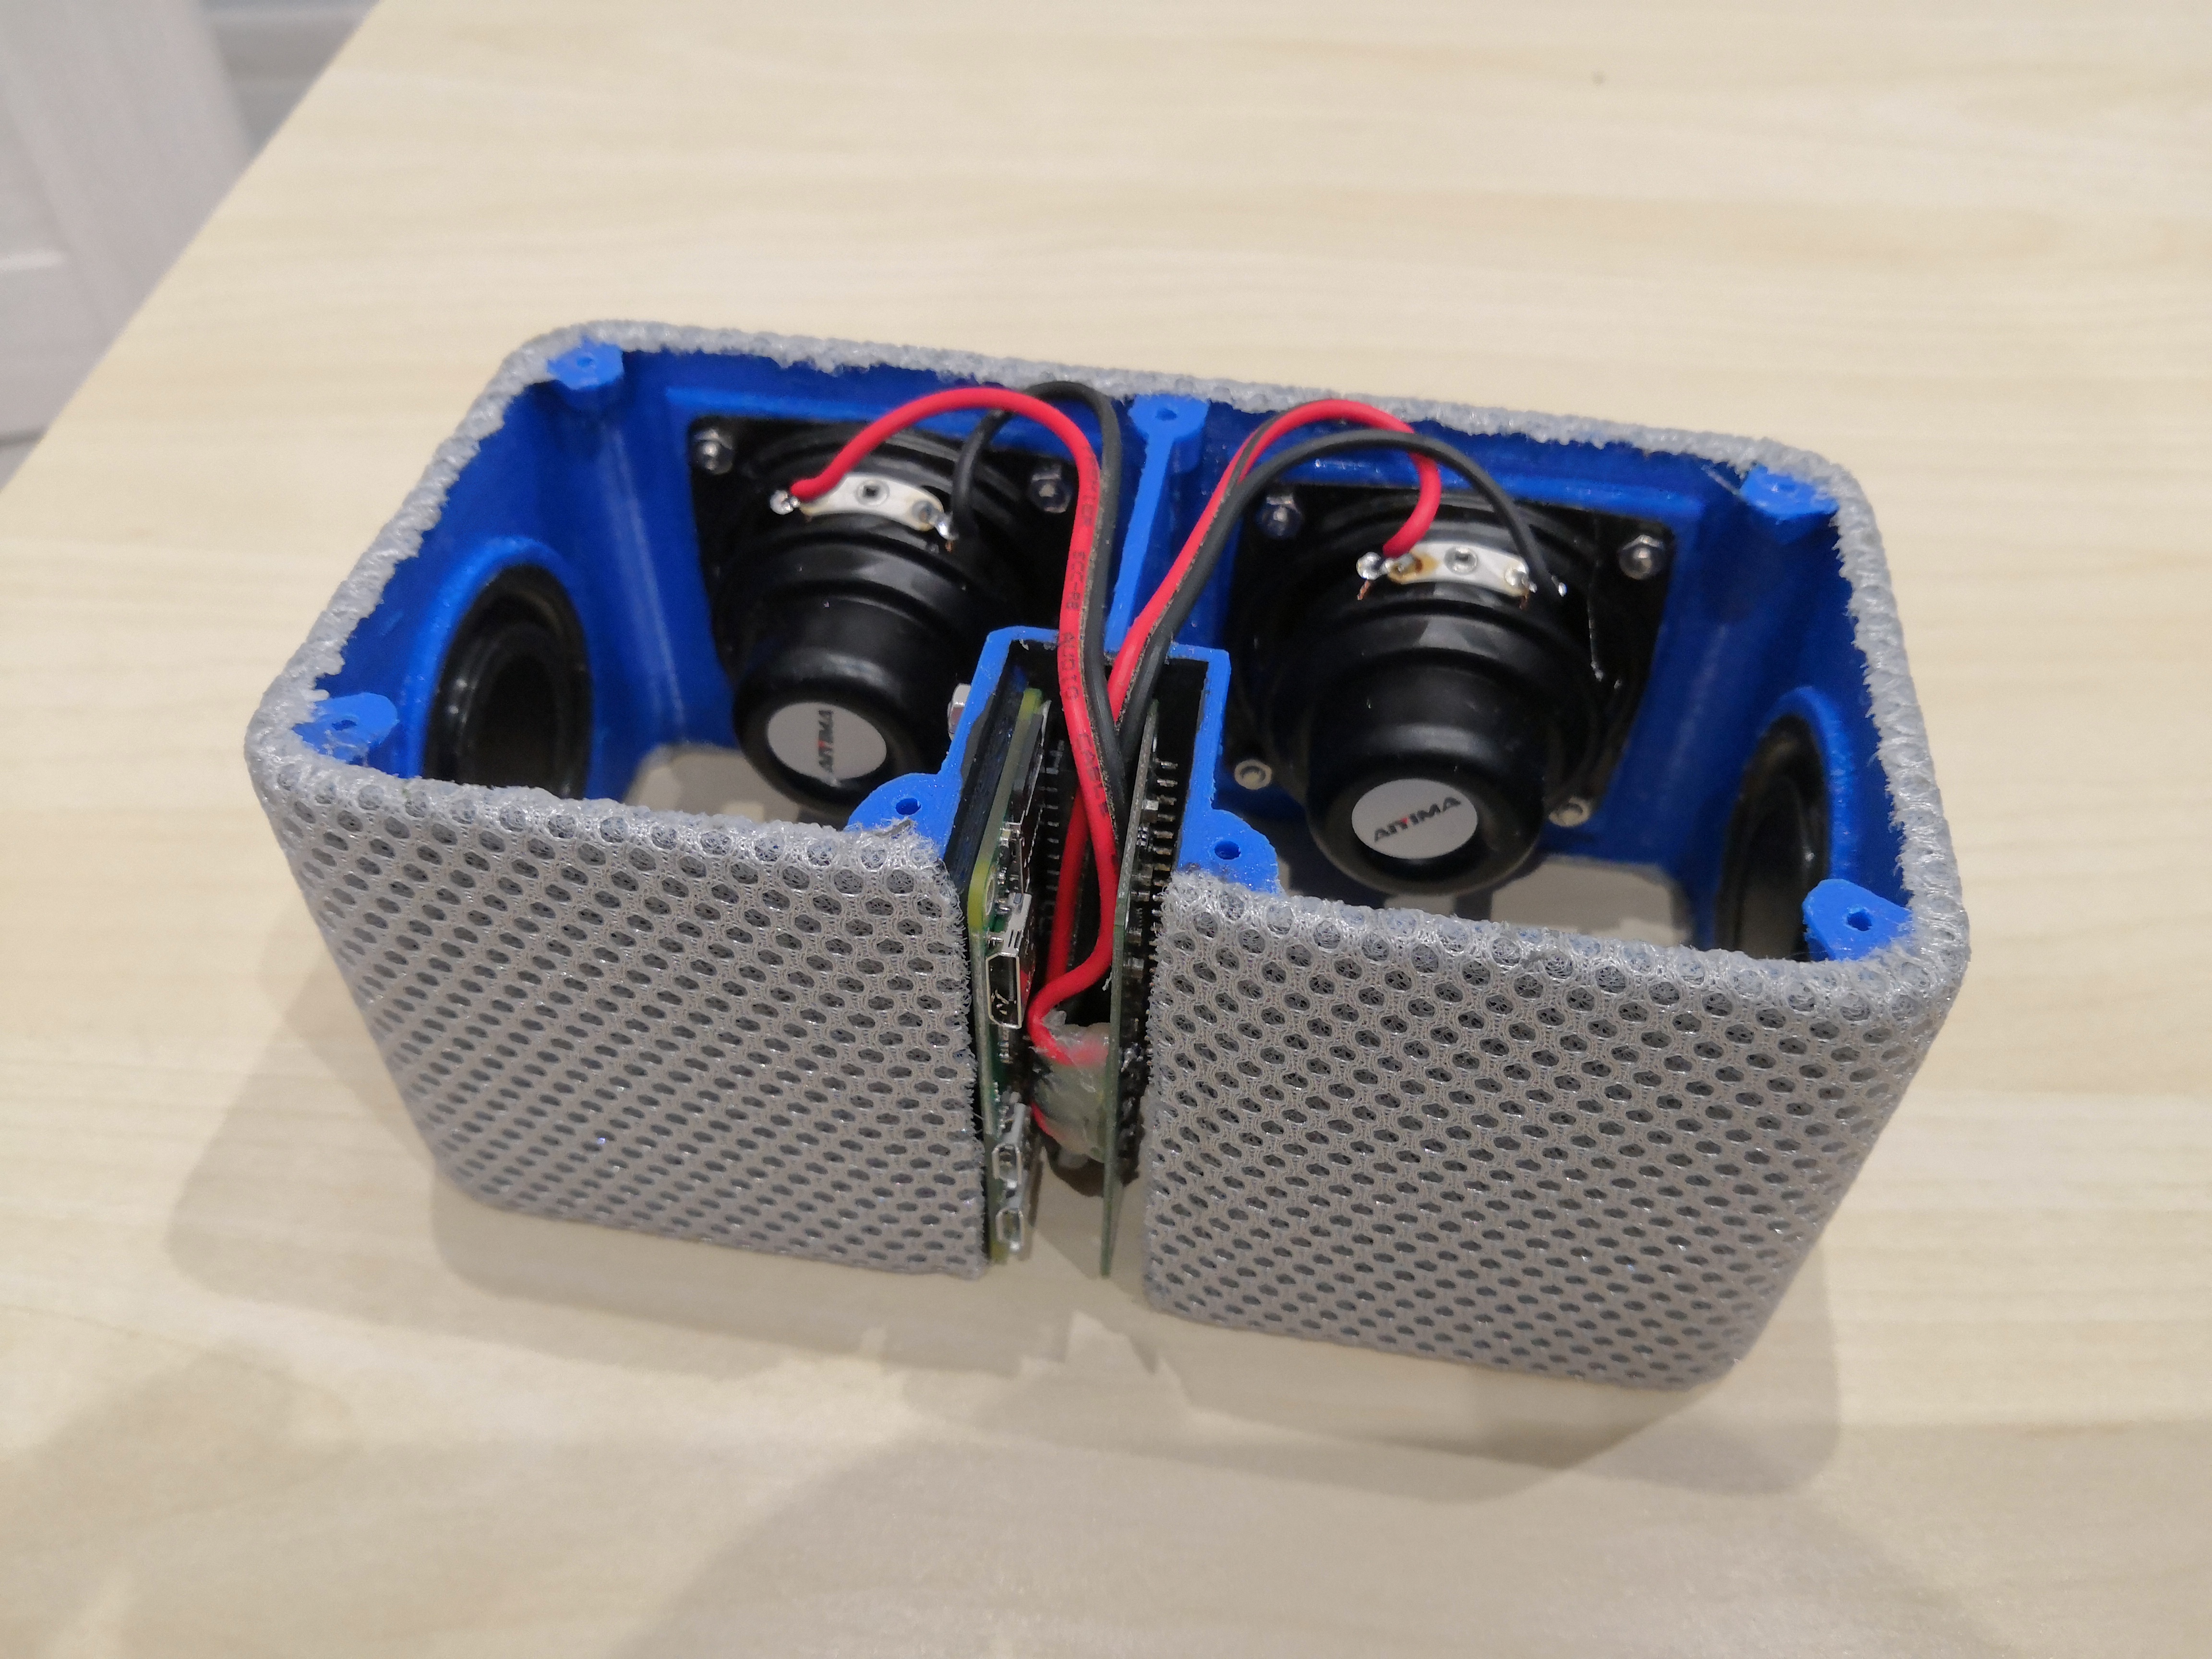
- Raspberry Pi Zero W
- Hifiberry MiniAMP
- 2x 2″ (53mm) full range speaker
- 2x 45mm vibration membrane
- >10W USB power supply
- ~30cm copper audio wiresAdditionally some modifications are to be made with Hifiberry MiniAMP board*:
*this voids warranty, but it is acceptable sacrifice for compactness. - The capacitor has to be unsoldered from bottom side and soldered back on bottom side (note polarity)
- Wire connectors have to be unsoldered. Audio wires have to be soldered instead (also from bottom side)
- Optional. Use hot glue in the soldering place to protect wires from breakage.Assembling:
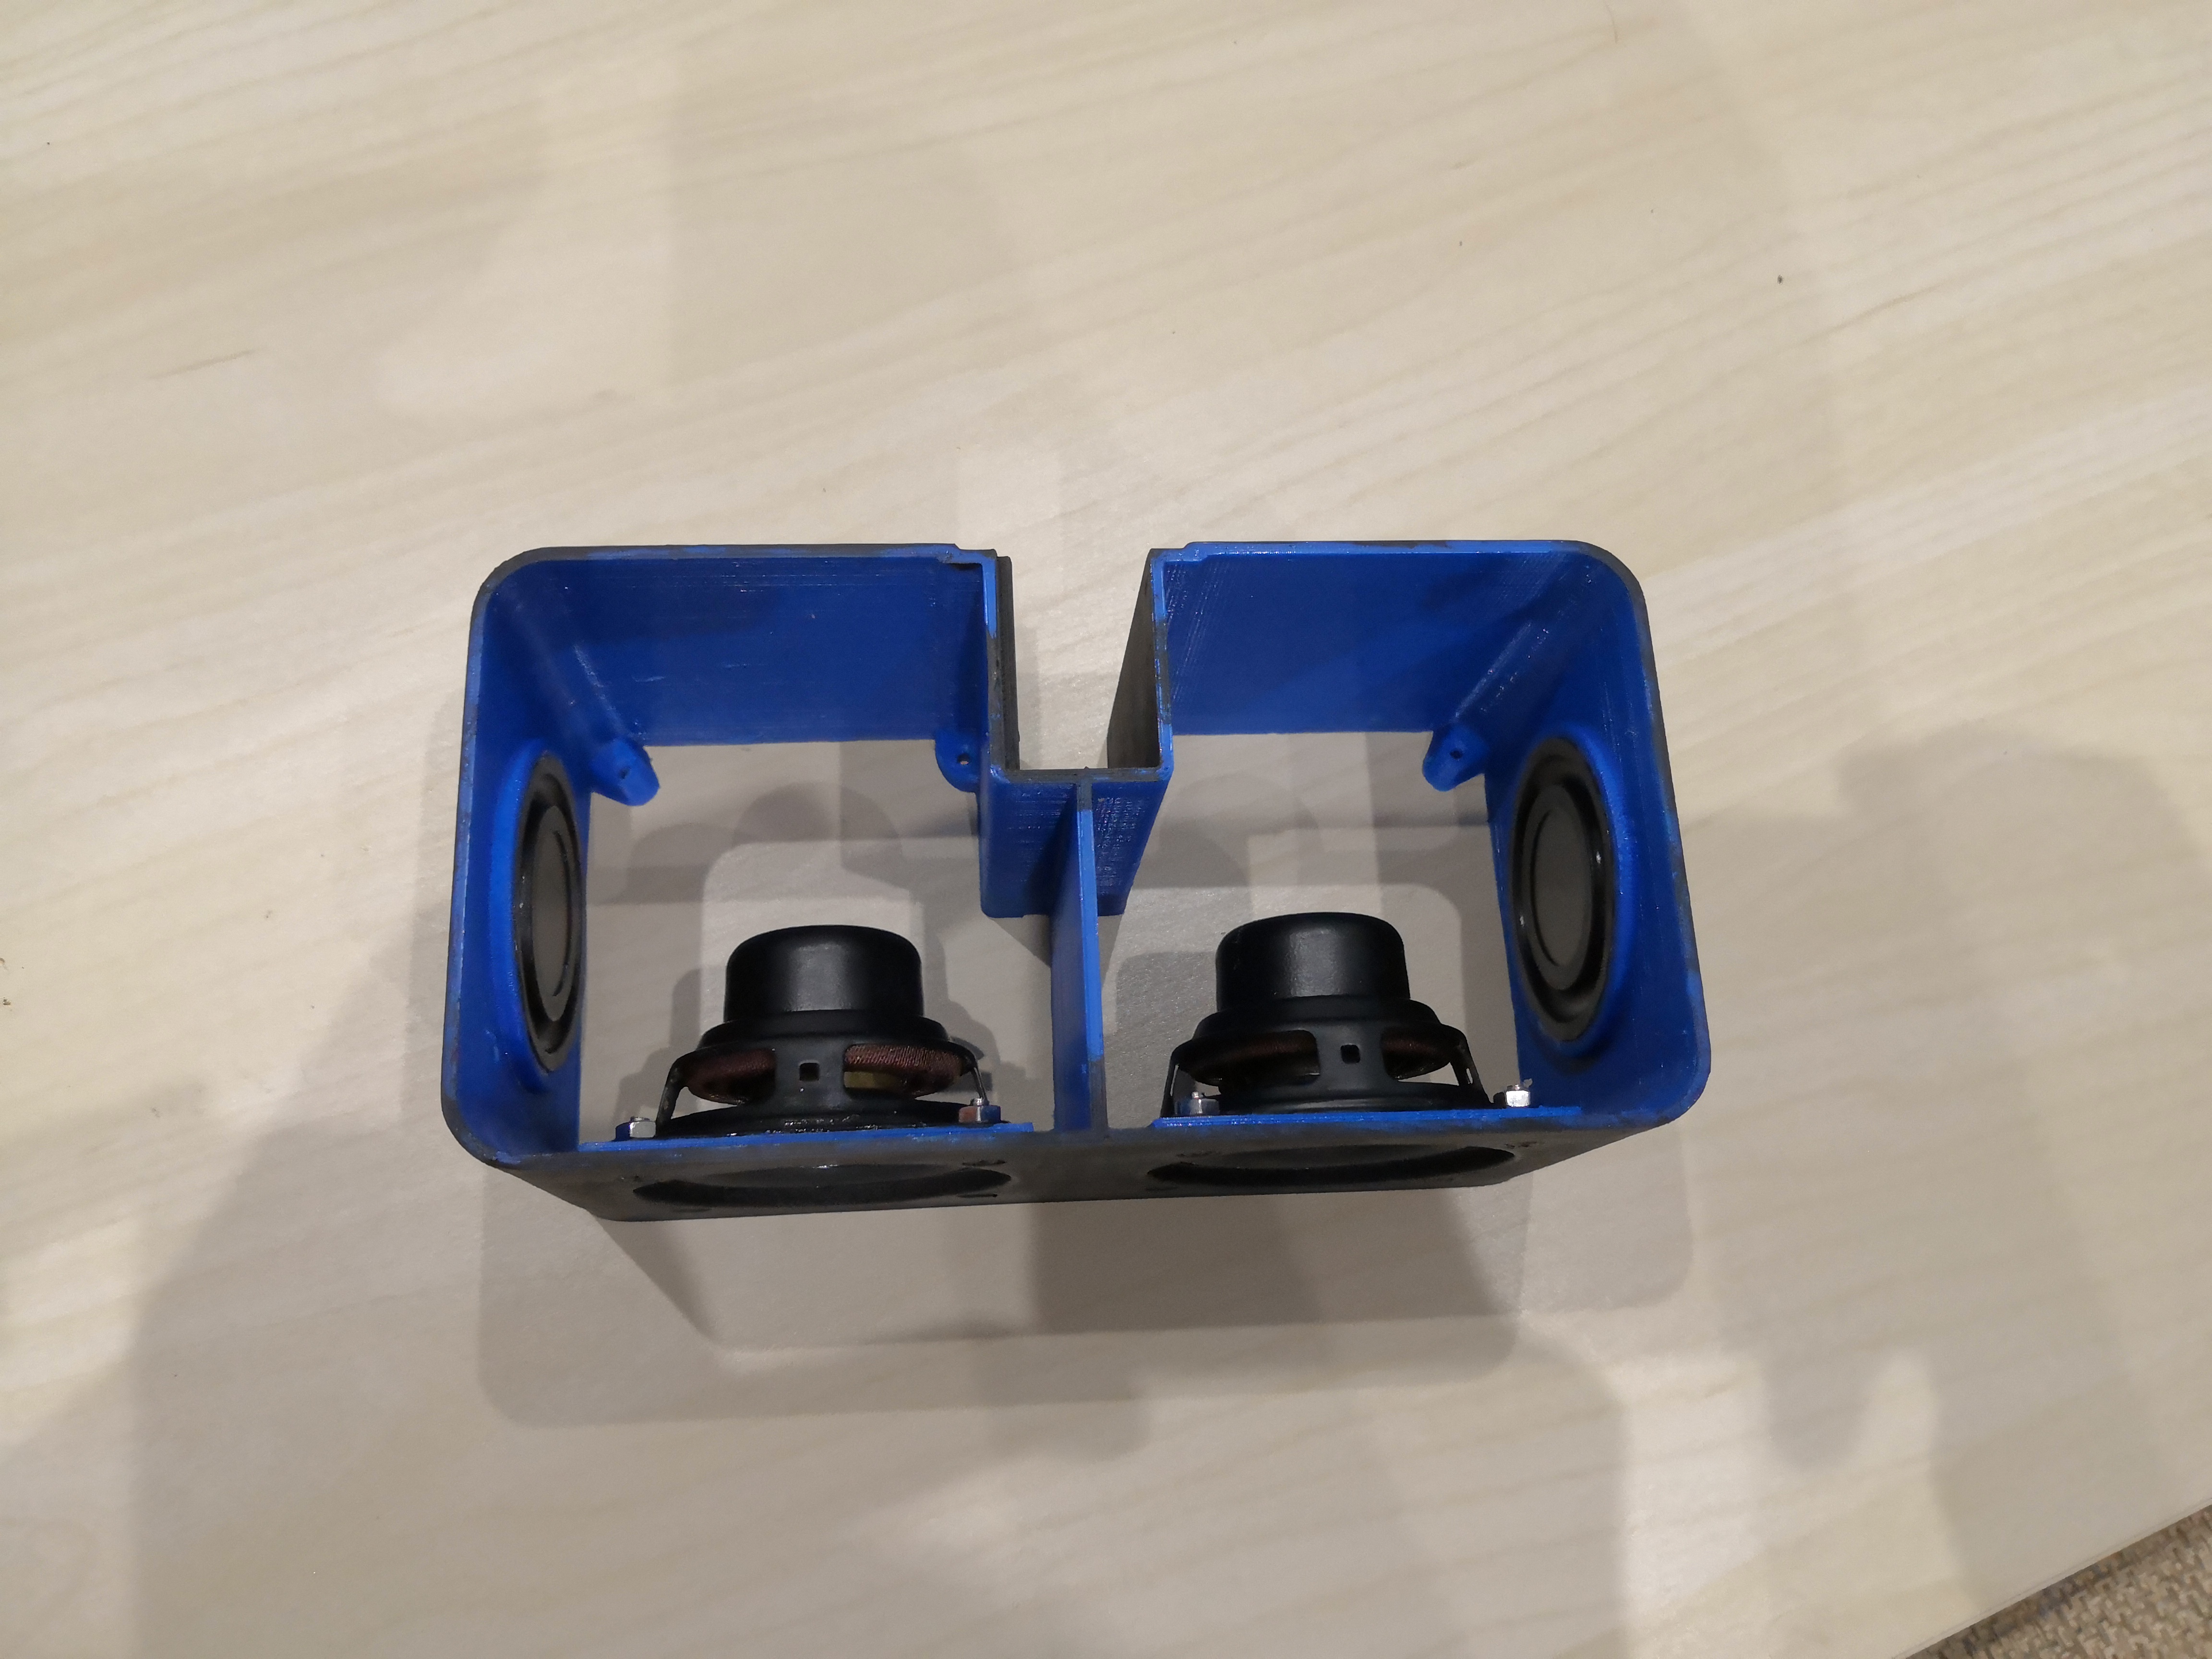
- Fasten membranes in place with contact adhesive.
- Screw speakers in place using 4x {M3 screw + nut + washer} per speaker. Speaker’s connectors have to be at bottom side.
- Connect Raspberry Pi Zero with Hifiberry MiniAMP and screw them in place. Raspberry’s SD card should also be at bottom side.
- Solder audio wires to speakers (note polarity)
- Optional. Cover body using any decorative material, f.e. acoustic fabric. Use PVA glue or contact adhesive for that purpose.
- Optional. Fill speaker’s cameras with any acoustic absorber material (this noticeably improves sound quality)
- Fasten top cover in place using contact adhesive or hot glue.
- Screw bottom cover using 7 flat-head screws (10-12mm length, 2.5 – 3mm diameter).
- Fasten back ports cover using hot glue or contact adhesive.
- Glue silicone pads (legs) on bottom cover.
Software:
There is no limitations for software to install. Volumio (or smth similar) is the simplest choice.
As for me, I use my own software called RadioBox (visit https://github.com/bellerofonte/radiobox for description and installation instructions).
There is no limitations for software to install. Volumio (or smth similar) is the simplest choice.
As for me, I use my own software called RadioBox (visit https://github.com/bellerofonte/radiobox for description and installation instructions).