Create a smart speaker from an older passive loudspeaker
Create a smart speaker from an older passive loudspeaker
A lot of you might still have old speakers from past laying or standing around unused. Many of these are from the “golden age” of HiFi in the 1980s-1990s. Even if you don’t own an old pair yourself, great speakers can be purchased used today for a fraction of the original price. The good news: Most speakers age quite well. Some speakers might need new surrounds (the rubber foam around the cone), but even replacing these isn’t rocket science.
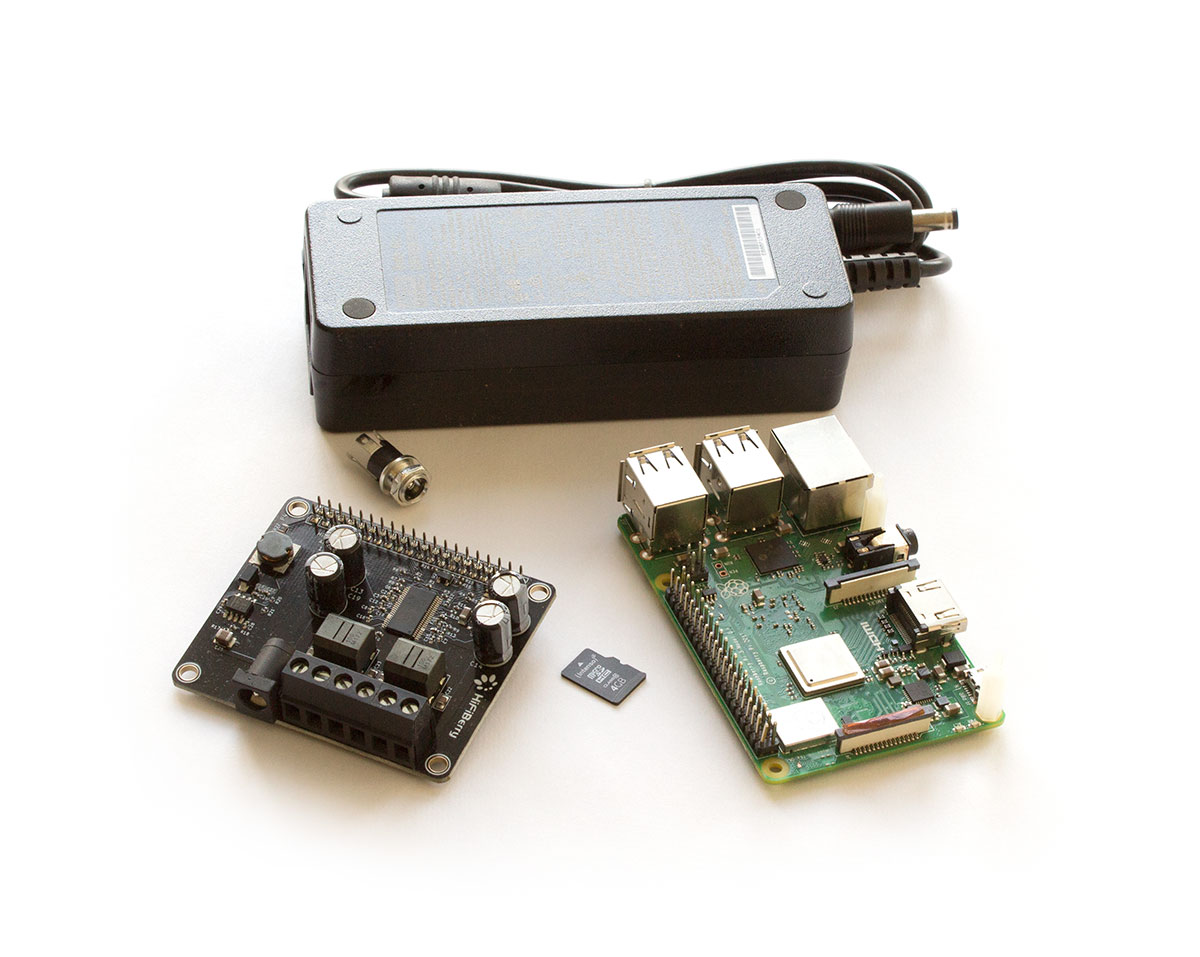
What you need
- A single or a pair of passive speakers
- Raspberry Pi
- HiFiBerry MiniAmp or Amp2
- SD card 4GB
- Power supply (12-18V for Amp2, 5V USB for MiniAmp)
- A power connector
Which amplifier is the right one for your project? While you might think, the MiniAmp with its 2x3W isn’t powerful enough for any project, this isn’t true. If you’re sitting not far from the speakers, even 2x3W are powerful enough for most speakers. If you want to use the speakers as desktops speakers for your computer, the MiniAmp is often powerful enough. If you want to listen to music in a larger room, go for the Amp2.
But wait – there is also the Beocreate 4 channel amplifier – why not use this one? You definitely can, but the additional 2 channels and DSP only makes sense if you either own one of the speakers B&O provides pre-defined DSP profiles or you can create you own DSP crossovers. If you are an DIY speaker expert, we definitely recommend the Beocreate 4 channels amplifier. If you have never heard about crossovers, filters and digital signal processing, this will be very challenging. Therefore, we only recommend the Beocreate 4 channel amplifier to experienced speaker builders for a project like this if you’re not using a supported B&O speaker.
Step 1: Test the speakers
Before spending a lot of time activating your speakers, make sure they still work. If you find defective surrounds, now is a good time to replace these. You might also replace the cover fabric if the speaker doesn’t look so good anymore.
For our project, we’ll use a pair of B&O RL6000 speakers. They are not as iconic as the Beovox CX50 and CX100 and the plastic might look a bit cheap. However, if you own a set of these, you will notice that the speakers are quite sturdy and B&O did a good job making sure there aren’t any resonances.
Step 2: Open the speakers
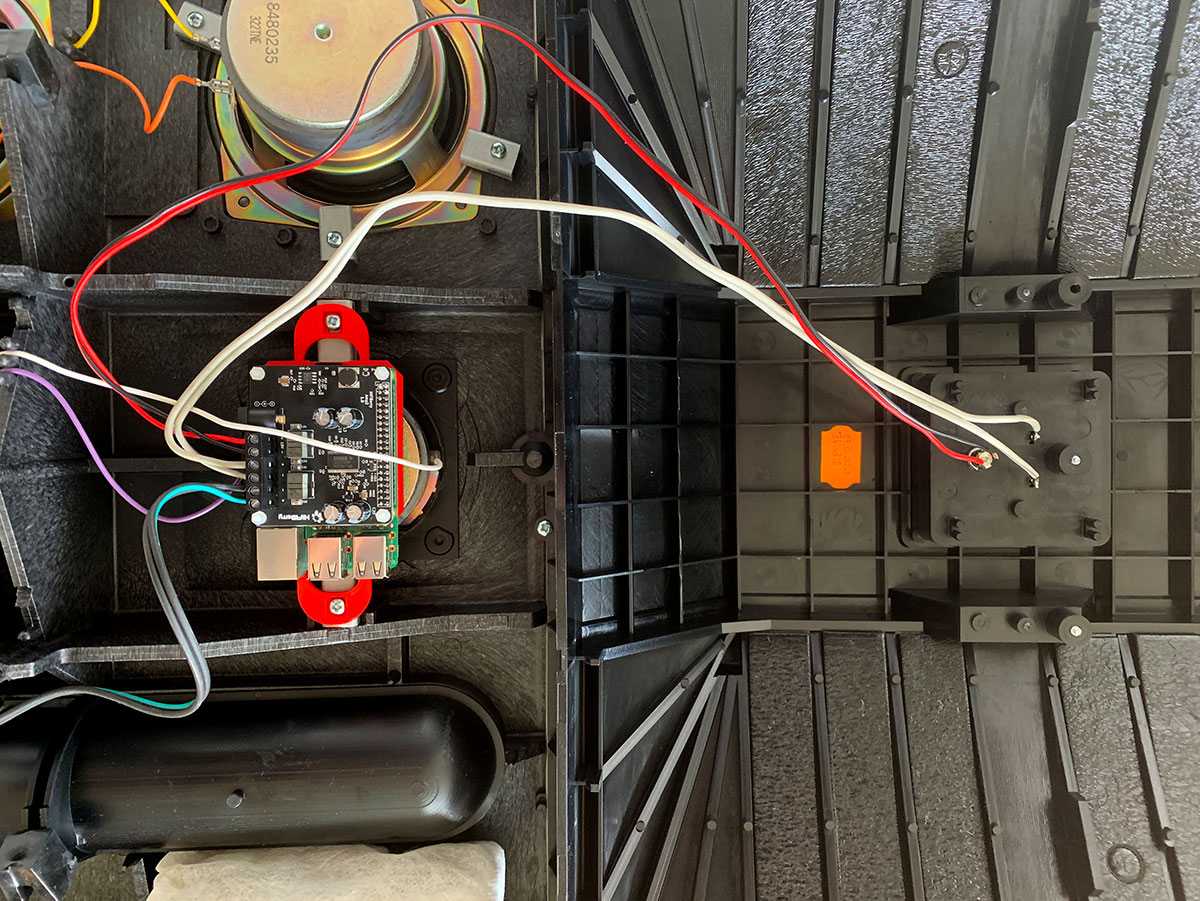
Depending on the speaker, you might be able to remove a back plate or just the connector terminal. Even the terminals will give you enough space to add the electronics. This example shows an B&O RL 6000 which offers plenty of space to add electronics.
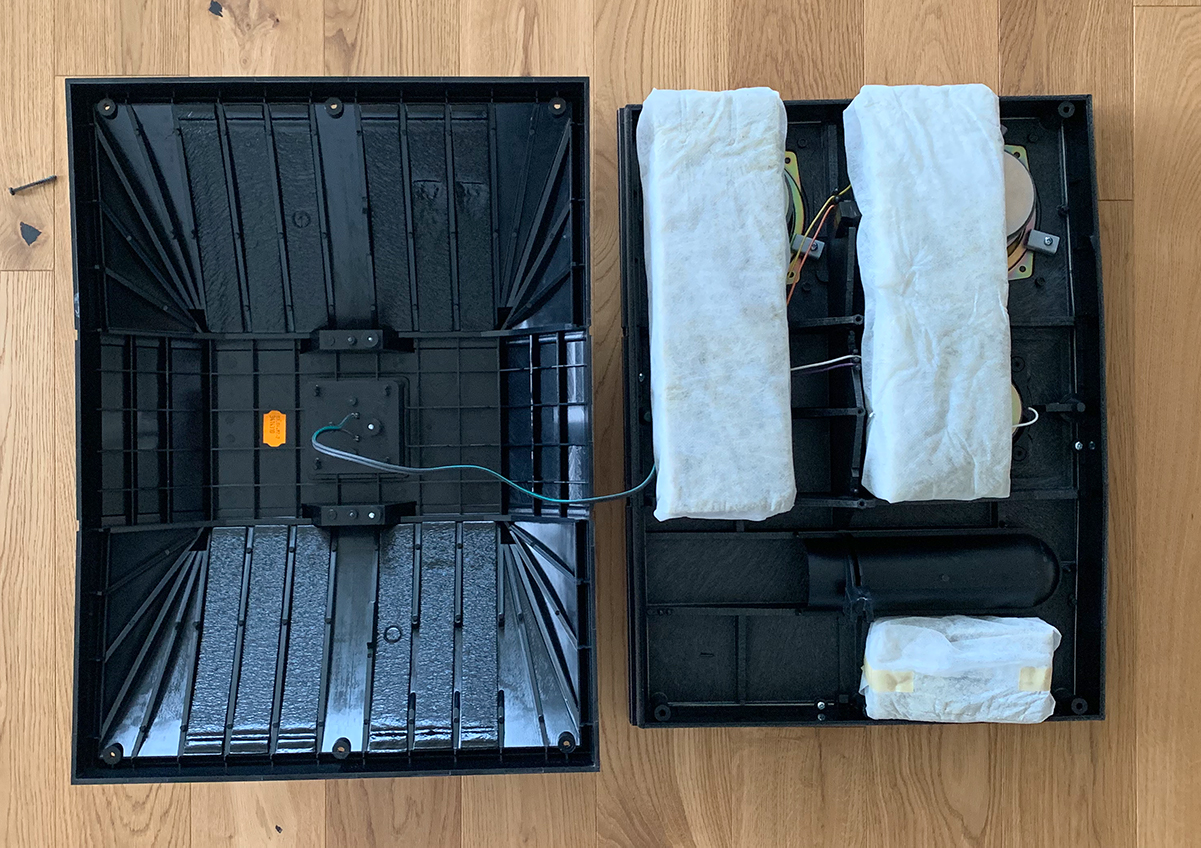
Usually you will find lots of damping (sonic insulating) material in the speaker. This is needed for the speaker to perform well. Keep it for now!
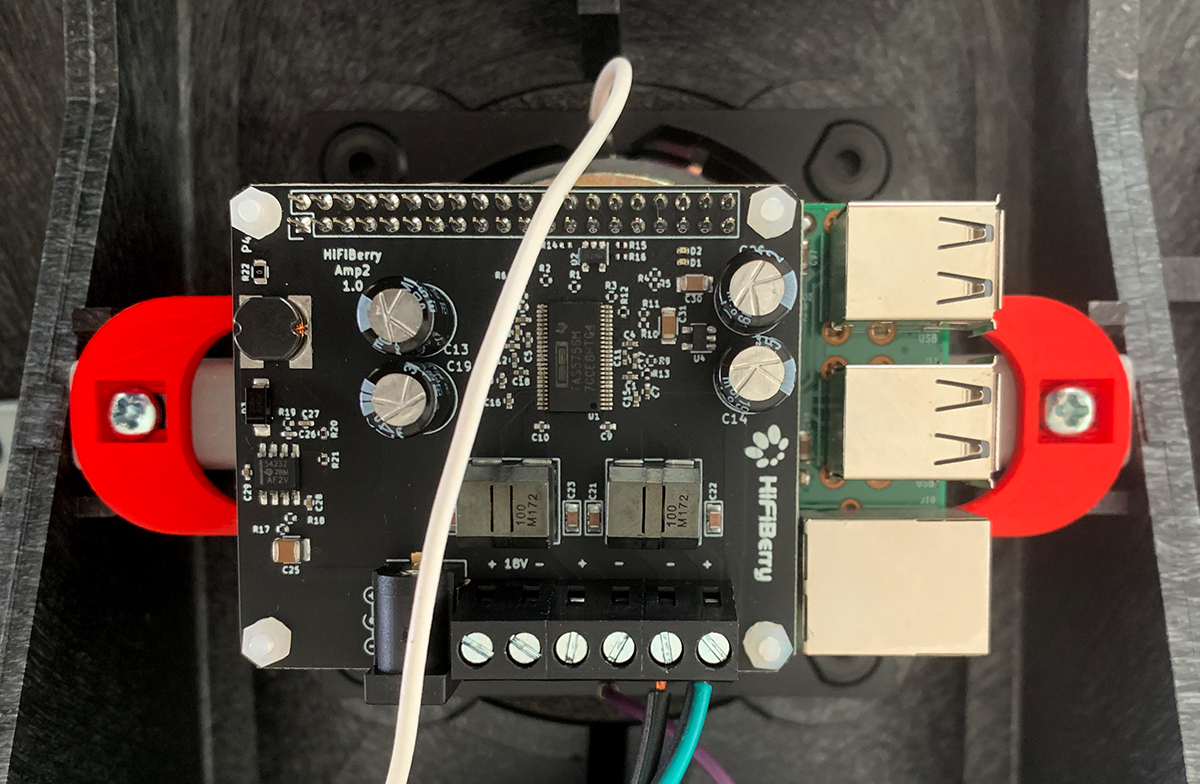
Step 3: Find a place to add the electronics
On larger speakers, it’s usually quite easy to find a place for the additional electronics, in smaller speakers it can become a bit more challenging. Thanks to 3D printing, we recommend that you design and print a cradle to fix the Raspberry Pi and amplifier wherever it fits best. This universal base is a good way if you can just find a flat wooden surface (which should be the case in most wooden speakers).
Have a look at other examples here for the B&O RL 6000 or B&O CX50/CX100
TODO: pics
Step 4: Add a power connector and speaker connector for the other speaker
We recommend using the existing speaker terminals an output to connect the second speaker to the electronics integrated in the first speaker. We will create a wired connection to the second speaker in the following steps.
For the power connector, you have several options:
- Drill a hole and just run a cable through this
- Drill a hole and add a power connector
- Use the speaker terminal (only makes sense if you build a Mono system)
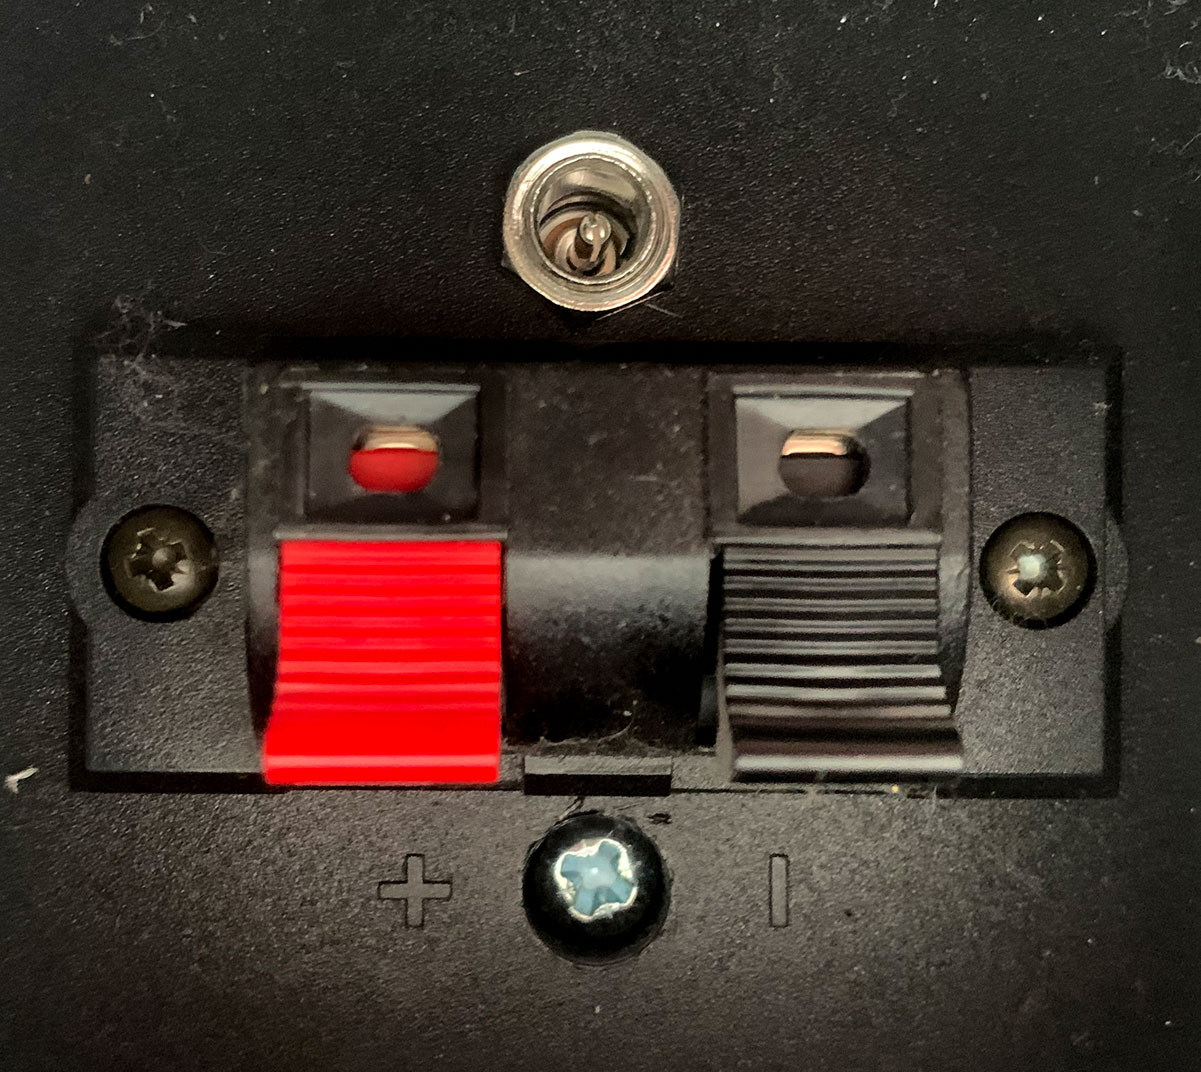
In our example we just drilled a hole near the speaker terminal. The original speaker terminal will still be used to connect the second speaker to the master speaker with the electronics.
Step 5: Write the software to the SD card
While there is a lot of software available for the Raspberry Pi, we recommend HiFiBerryOS for this project. Why? Because it doesn’t need a screen, automatically configures itself for the MiniAmp or Amp2 and comes with players for everything that most people require: Airplay, Bluetooth, Spotify and a lot more. If you never installed software on an SD card, have a look here.

Step 6: Boot the system and test everything
Now start the system and test everything without closing the speaker. It will sound terrible, because the speaker isn’t closed yet, but it should be good enough to see that everything is working.
Step 7: Close the speaker, connect the second speaker
Before closing the speaker, put in the damping material again. You might remove a bit of it to make sure that the amplifier isn’t fully packed into damping material, but try to put back as much as possible. You have to find a good compromise between air circulation from the amplifier and damping.
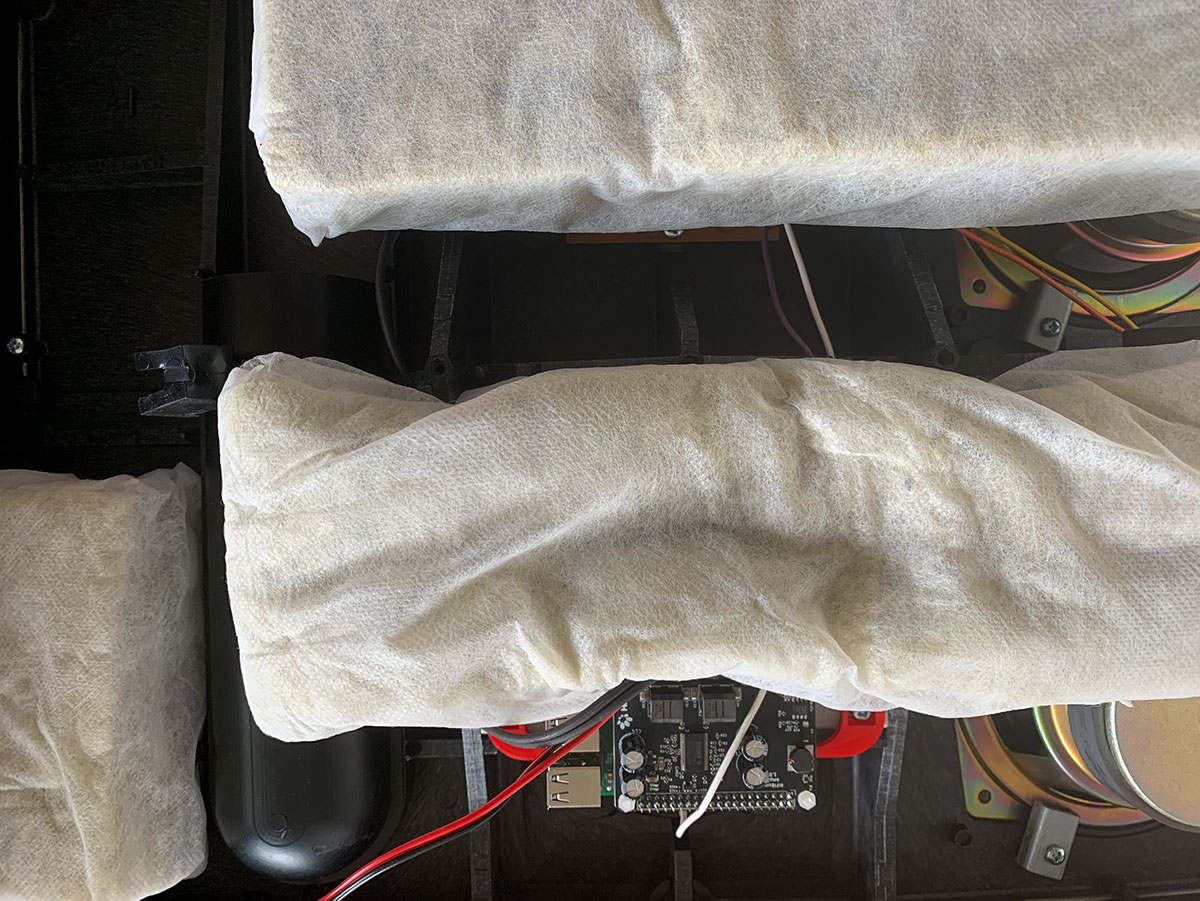
This picture shows how we inserted the original damping material and still made sure the amplifier chip and the output filters of the Amp2 can dissipate heat.
Step 8: Enjoy the music
Don’t forget the use this speaker. We see a lot of people always trying to improve their audio equipment but often don’t find the time to listen. Just relax and enjoy the music!
