SMART MUSIC MULTIROOM SETUP
SMART MUSIC MULTIROOM SETUP
This guide was created by our software parter Max2Play and has been published first here.
Please note that Max2Play is a licensed software. Though they offer a trial period, you will need to purchase a licence beyond that time. However, the software offers many different options and plugins and full customer support from Max2Play. You can download the free 3-month test trial here.
Intro: Smart Music in Bedroom and Bath With Raspberry Pi – Integrating Multiroom, Alarm, Button Control and Home Automation
Today we want to give you two examples on how you can use the Raspberry Pi with our Max2Play software for home automation: in the bathroom and bedroom. Both projects are similar in that high-fidelity music from various sources can be streamed through the (open-source) Squeezebox technology which comes as a free one-click installer with Max2Play.
Advantages of such a Multi-room setup are that you can synchronize the players in all rooms (play simultaneously), use various different audio sources for the Squeezebox Server (network drive NAS, USB drive, DLNA, Spotify, Google Music, Internet Radio, Bluetooth, etc.) and have complete control over all audio players with just one App (or web browser) of your choice.
The hardware presented in the following configuration offer these advantages:
- high quality of music playback
- low acquisition costs (DIY project)
- well-engineered hardware concept (Raspberry Pi, ‘bulletproof’ audio cards from tested, verified vendors)
- Minimalist design: thanks to hidden installations or high-end bezels, the cables and hardware can be hidden away completely
Step 1: The Components
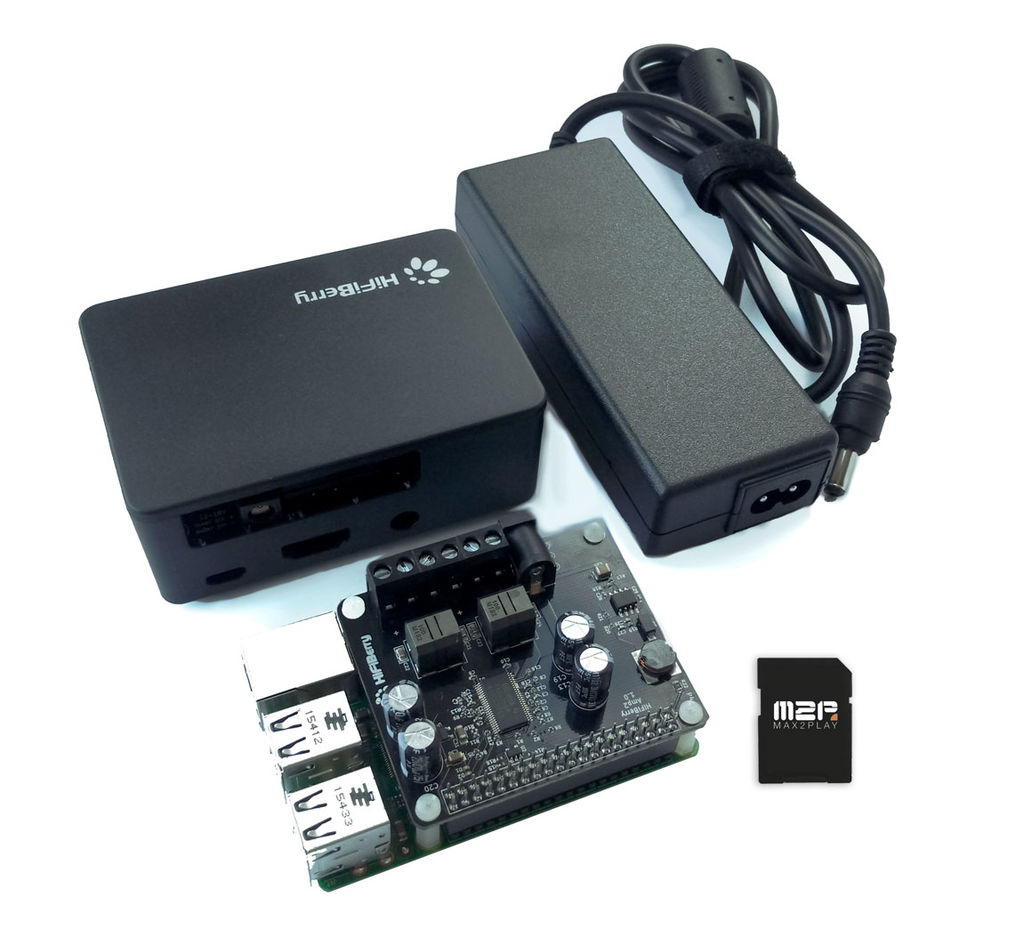
The required items for this system may vary, depending on how big you want your multi-room setup to be. Here, we will assume the basic setup using one set of speakers for each room. Based on the intended scope of your setup, you can add or remove as many players as you want.
A combination of digital-analogue-converter and amplifier makes the most sense for rooms without pre-existing audio components. The HiFiBerry AMP2 is the perfect fit for that.
You need one Raspberry Pi AMP2 bundle setup for each room. So for this specific example, two individual setups can be selected based on the rooms’ individual challenges and opportunities.
Basic setup:
- Raspberry Pi 3B
The heart of this media center is the affordable but powerful 3B, it can handle multiple audio and video players with its quad core processor and 1 GB RAM. You can also use the 2B if you do not need WiFi or Bluetooth, or the 3B+. However, the 3B+ does not offer any significant advantages for this setup and requires more power.
- HiFiBerry AMP2
With this combination of digital-analogue-converter and amplifier you’ll get better sound quality and be able to power passive speakers directly from the Pi.
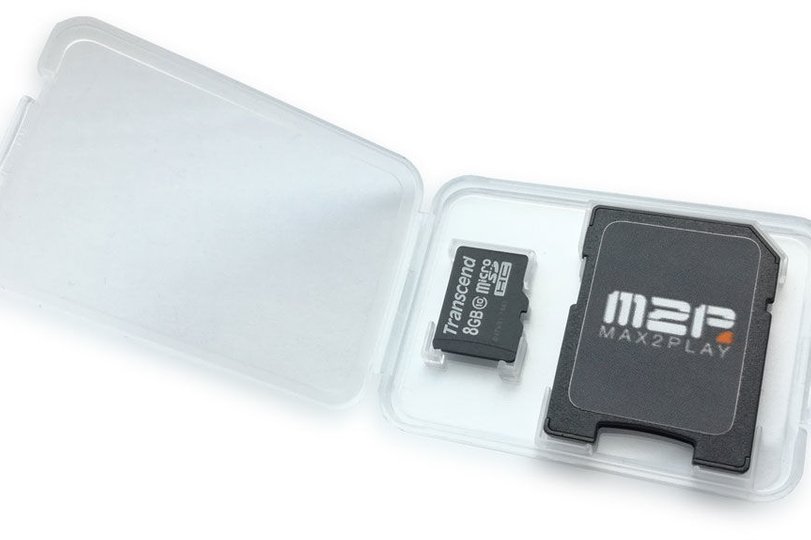
- Micro SD card
We recommend using a 8 or 16 GB Micro SD with write speed Class 10 or higher. The Linux-based Max2Play image includes various audio solutions and other extensions that can be managed from any web browser. Once burnt, the system is accessible from the first boot through the web interface and does not require any console commands or Linux knowledge.
- Power Supply
You’ll only need one power supply to run all components (Pi, Amp HAT and passive speakers).
- Passive speakers (we used JBL-One Control and Canton GLE 410.2)
Any speakers can be used, just pay attention to your Amp HAT’s capacity and the power supply when selecting them. Based on the impedance and max wattage you can find the ideal combination for each zone.
Optional: Rotary Encoder or IR Receiver for hardware control
Step 2: Burn the Image on MicroSD Card
The Max2Play Image can be burned onto a card using a simple tool like WinDiskImager or Etcher. Just let it burn and once the process is done, put the card into the Raspberry Pi.
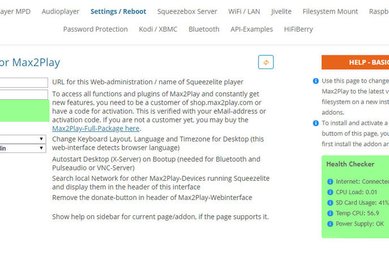
The configuration of the devices is quiet easy. You can access the Max2Play web interface by entering “max2play/” into any browser on any device connected to the same network (PC, Mac, Smartphone, Tablet, etc.).
After the first start, we recommend renaming the device on the Settings/Reboot page of the web interface. This way, the name will also be used for the audio players’ name and be shown as such in the Squeezebox Server.
If your router has WPS (Wireless Protected Setup) and the device is accessing WiFi in the network, the first start can be done completely automatically. Just activate the WPS on your router and connect the device to the power supply. We also made a separate Instructable for setting up WPS.
Optional: You can also order an already burned and configured microSD card from Max2Play.
Step 3: Set Up the Audioplayer
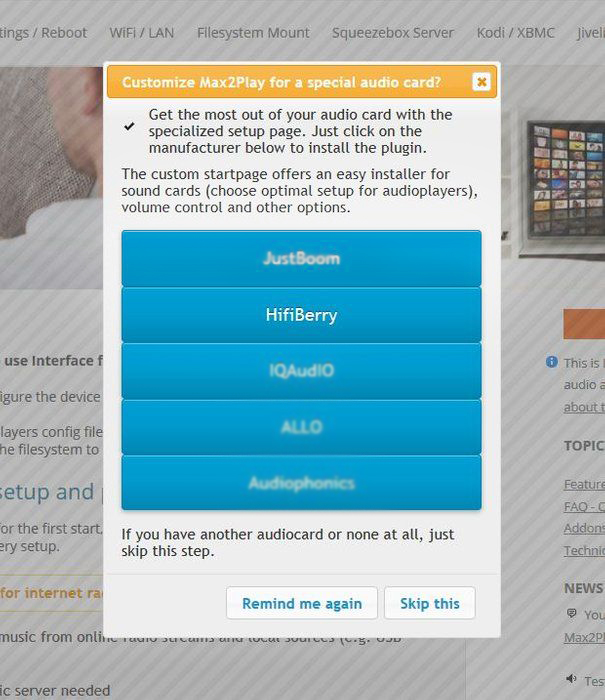
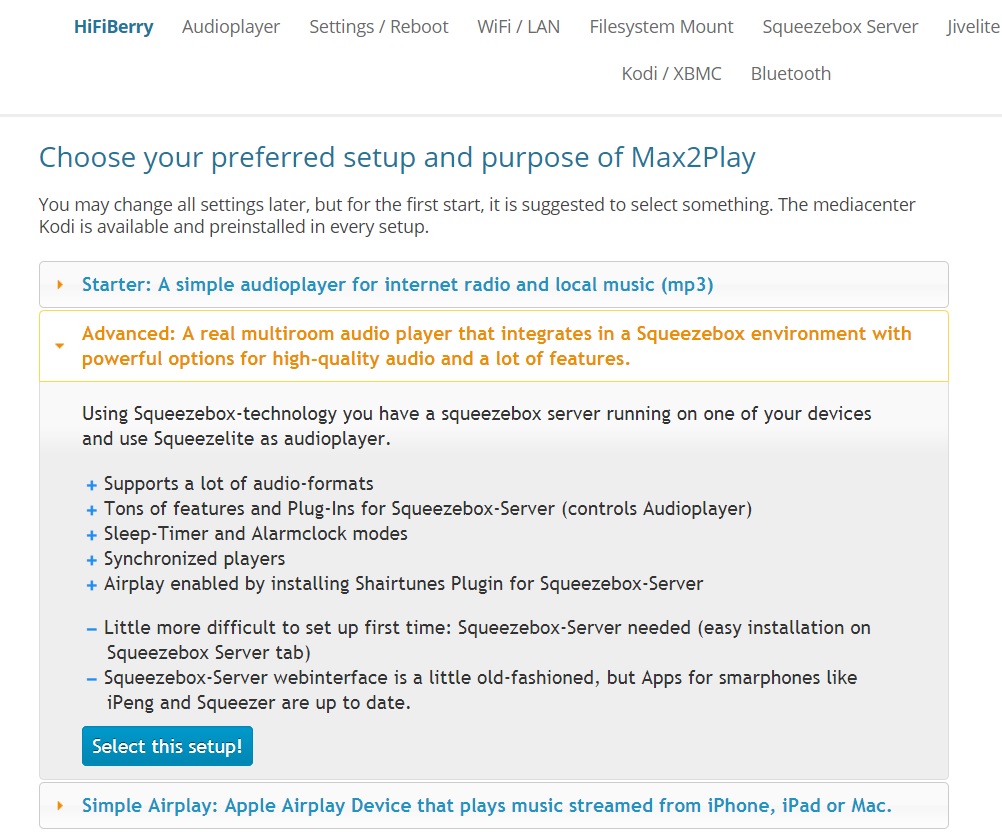
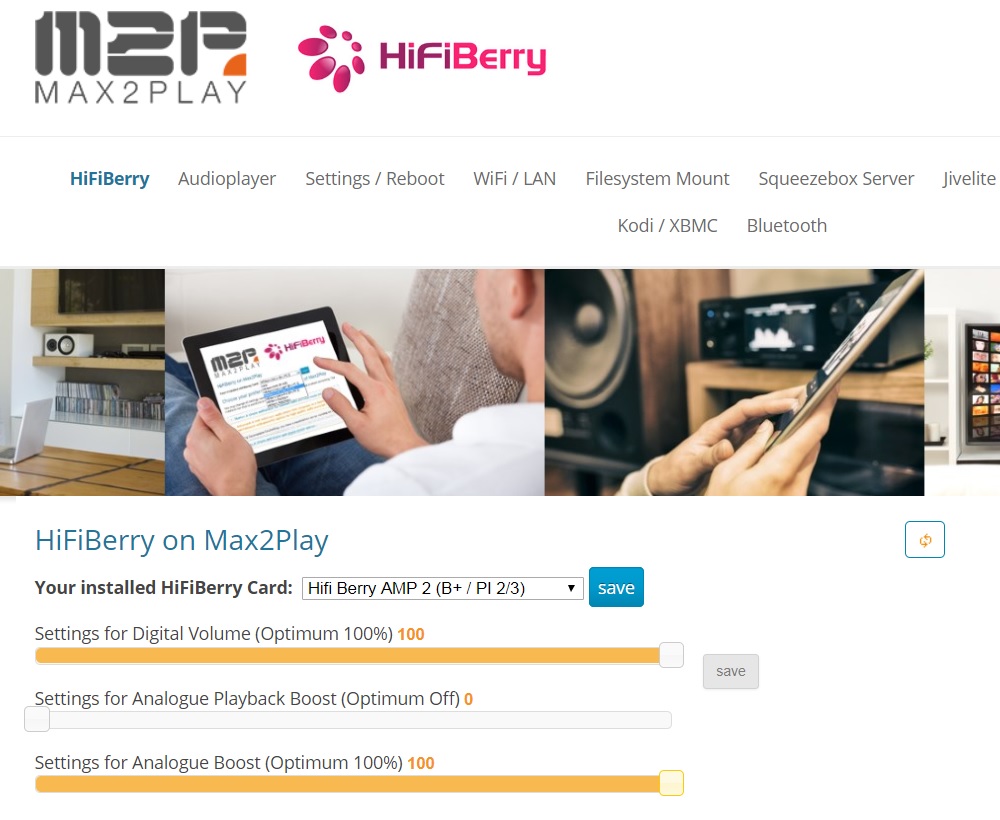
When you first start up your Max2Play device, choose HiFiBerry for your connected sound card. The correct plugin will be loaded and then you’ll be able to select your specific sound card in the new menu that opens up.
Click save. After rebooting your device, select “Advanced” below the sound card selection to get everything set up ideally for a multi-room setup. After another restart your player should already be accessible to play music to.
Step 4: Set Up the Squeezebox Server

To set up the Squeezebox Server you need to install it first. The plugin itself is preinstalled on the Max2Play image, so there is no need to download it beforehand.
Important: You only need one installation of the Squeezebox Server for your multiroom system.
All you need to do is go to the menu of the Squeezebox Server in the Max2Play web interface, choose a version of the Logitech Media Server (7.9.1 recommended) and click install. Max2Play automatically downloads your selected version and installs it fully on the Raspberry Pi.
After the installation is finished, you’re able to open the Squeezebox Server’s own web interface by clicking the big blue button on the page. Now you can choose your players, configure your library and music services and, of course, play music.
Step 5: The Installation – Bedroom
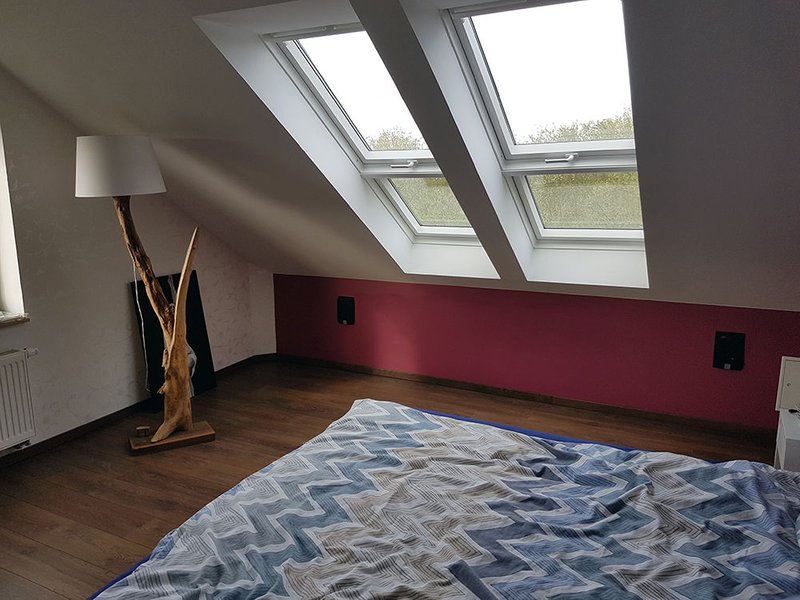
Now that the Server is active and running, we need to set up the hardware around our Raspberry Pi setup.
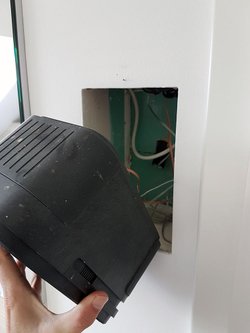
For the bedroom setup we built wooden boxes where our speakers would fit in. Then we cut out holes of the wall, which had the size of those boxes. Finally, we screwed the boxes tight into the wall. All hardware is still accessible through a revision opening.
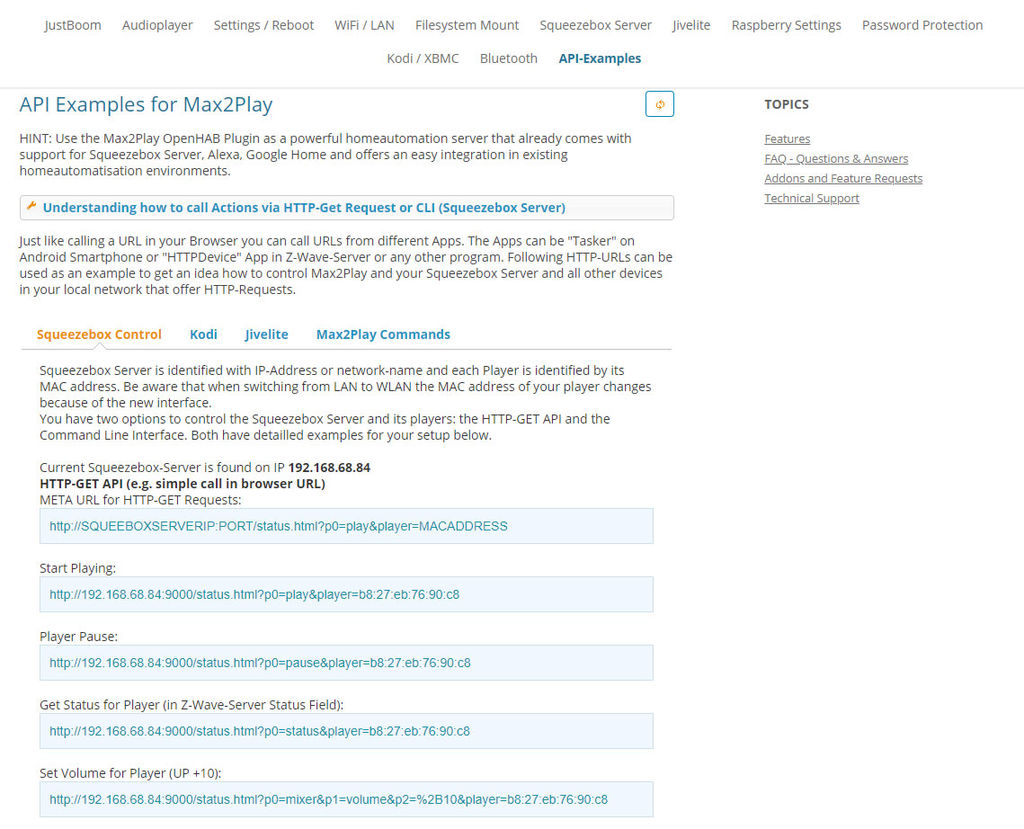
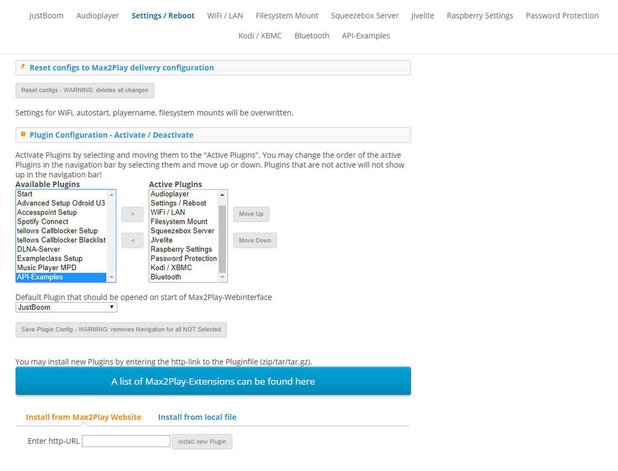
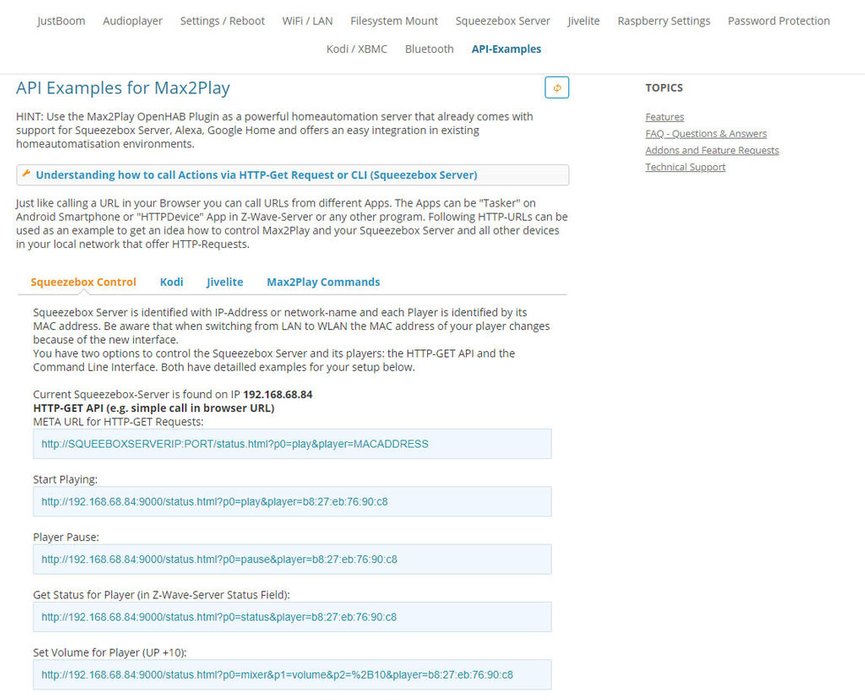
To control the speakers, you may use a smartphone app or connect the player with existing home automation buttons e.g. on the door of your bedroom. You could add a long button push to activate the sleep timer and a short push for Play/Pause. The Squeezebox Server, thanks to its open interface, offers many possibilities to configure any commands. Fitting HTTP and CLI commands can be found in our API-Examples plugin which is also preinstalled and can be activated free in our inactive Plugins section under Settings/Reboot.
Example HTTP command for “start playing”:
http://SQUEEBOXSERVERIP:PORT/status.html?p0=play&player=MACADDRESS
Step 6: The Installation – Bathroom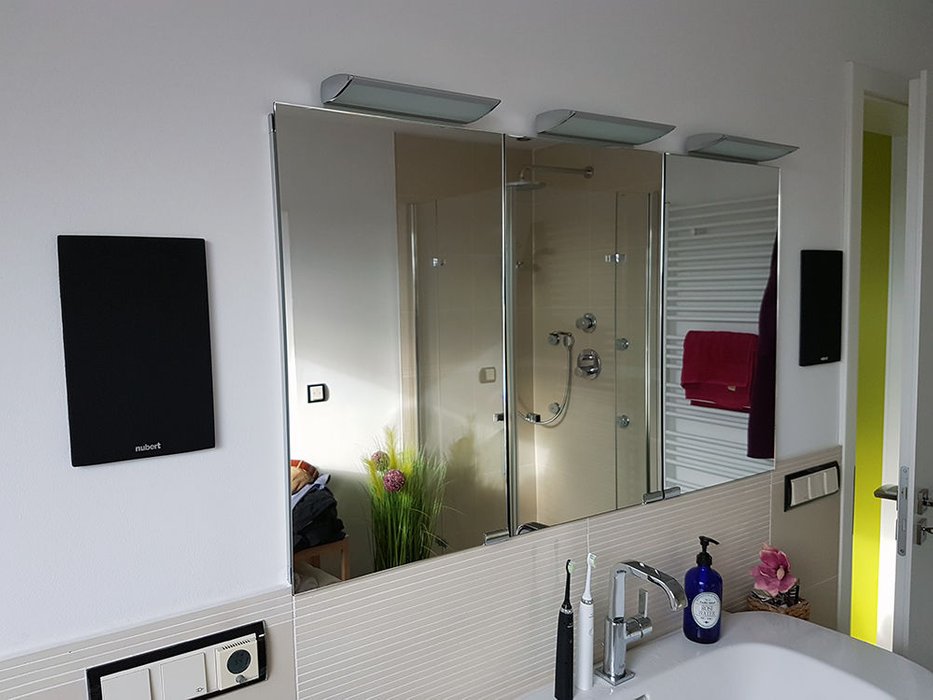

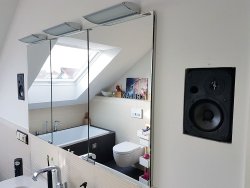
The speakers can be placed in the ceiling or, as pictured, to the left and right side of the mirror. If you are still planning the design of your bathroom, a front wall construction would be ideal to accommodate both mirror cabinet and speakers at the same time (see pictures). In this scenario, a larger speaker bezel could be bought (sold separately) to have a visual border for the speakers (see picture 1).
A push button solution for quick Play/Pause on the door of the bathroom, connected to a pre-existing home automation software, makes daily use even more comfortable. An IR remote or a volume control knob with integrated button can also be integrated for direct control. Generally, however, it is most comfortable and easy to use a smartphone and one of the many available apps, like iPeng, OrangeSqueeze or Squeezer (pictured, free app), to take advantage of all the advanced features (music selection, playlist management, etc.).
Step 7: Integration Into Home Automation

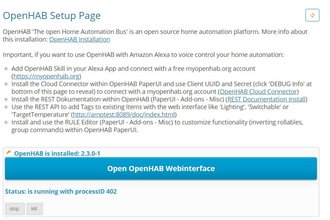
For the integration of a home automation system and for the programming of a push button on the door (e.g. in the Homematic Software), CLI (Command Line Interface) commands of the Squeezebox Servers can be used. You can even install the open-source home autmation server on Max2Play. We recently released a one-click installer of the popular openHAB 2 server with Paper UI as a new premium plugin.
These home automation systems allow for a centralized management of individual players, either with simple HTTP commands (like opening something via browser), via Telnet, or with a direct socket connection in another software. Concrete commands and examples for this can be found and directly copied in the Max2Play API-Examples Plugin and in the internal help section of the Squeezebox Servers under „Technical Information > Command Line Interface“.
HTTP commands can also easily be tested in the browser. Just paste the command, in the URL bar of the browser and hit enter.