Stackable Cases
Stackable Cases
Stackable, tool free cases for HifiBerry boards with Raspberry Pi 3 and Raspberry Pi 4 boards with additional rackmount
Creator: Christian Huchler
Download the files:
Vision
The initial idea was it, to create a simple, tool free case for the Raspberry Pi. I have more than one RPi at home. Therefore, I created a case, which can be stacked on each other. To add some nice features, I designed it to be completely tool free. This means you do not need any screws to fix the RPi in the case. If you don’t use the cover plate of the case. You can easily put another case on the initial one and you get a simple stackable case.
This case for the RPi3 B models is available on Thingiverse for more than a year now.
Sometimes ago, I also bought an HiFiBerry AMP2 for one of my RPi. This was the time to redesign the case to fit with the HifiBerry board. With this redesign, I improved the cooling system of the case, because the AMP produces some more heat than just a RPi. Of course, I kept the advantages of the case like tool free mounting of the RPi. I designed this case to be used with the distance screws and bolts which keep the HiFiBerry board and the RPi together.
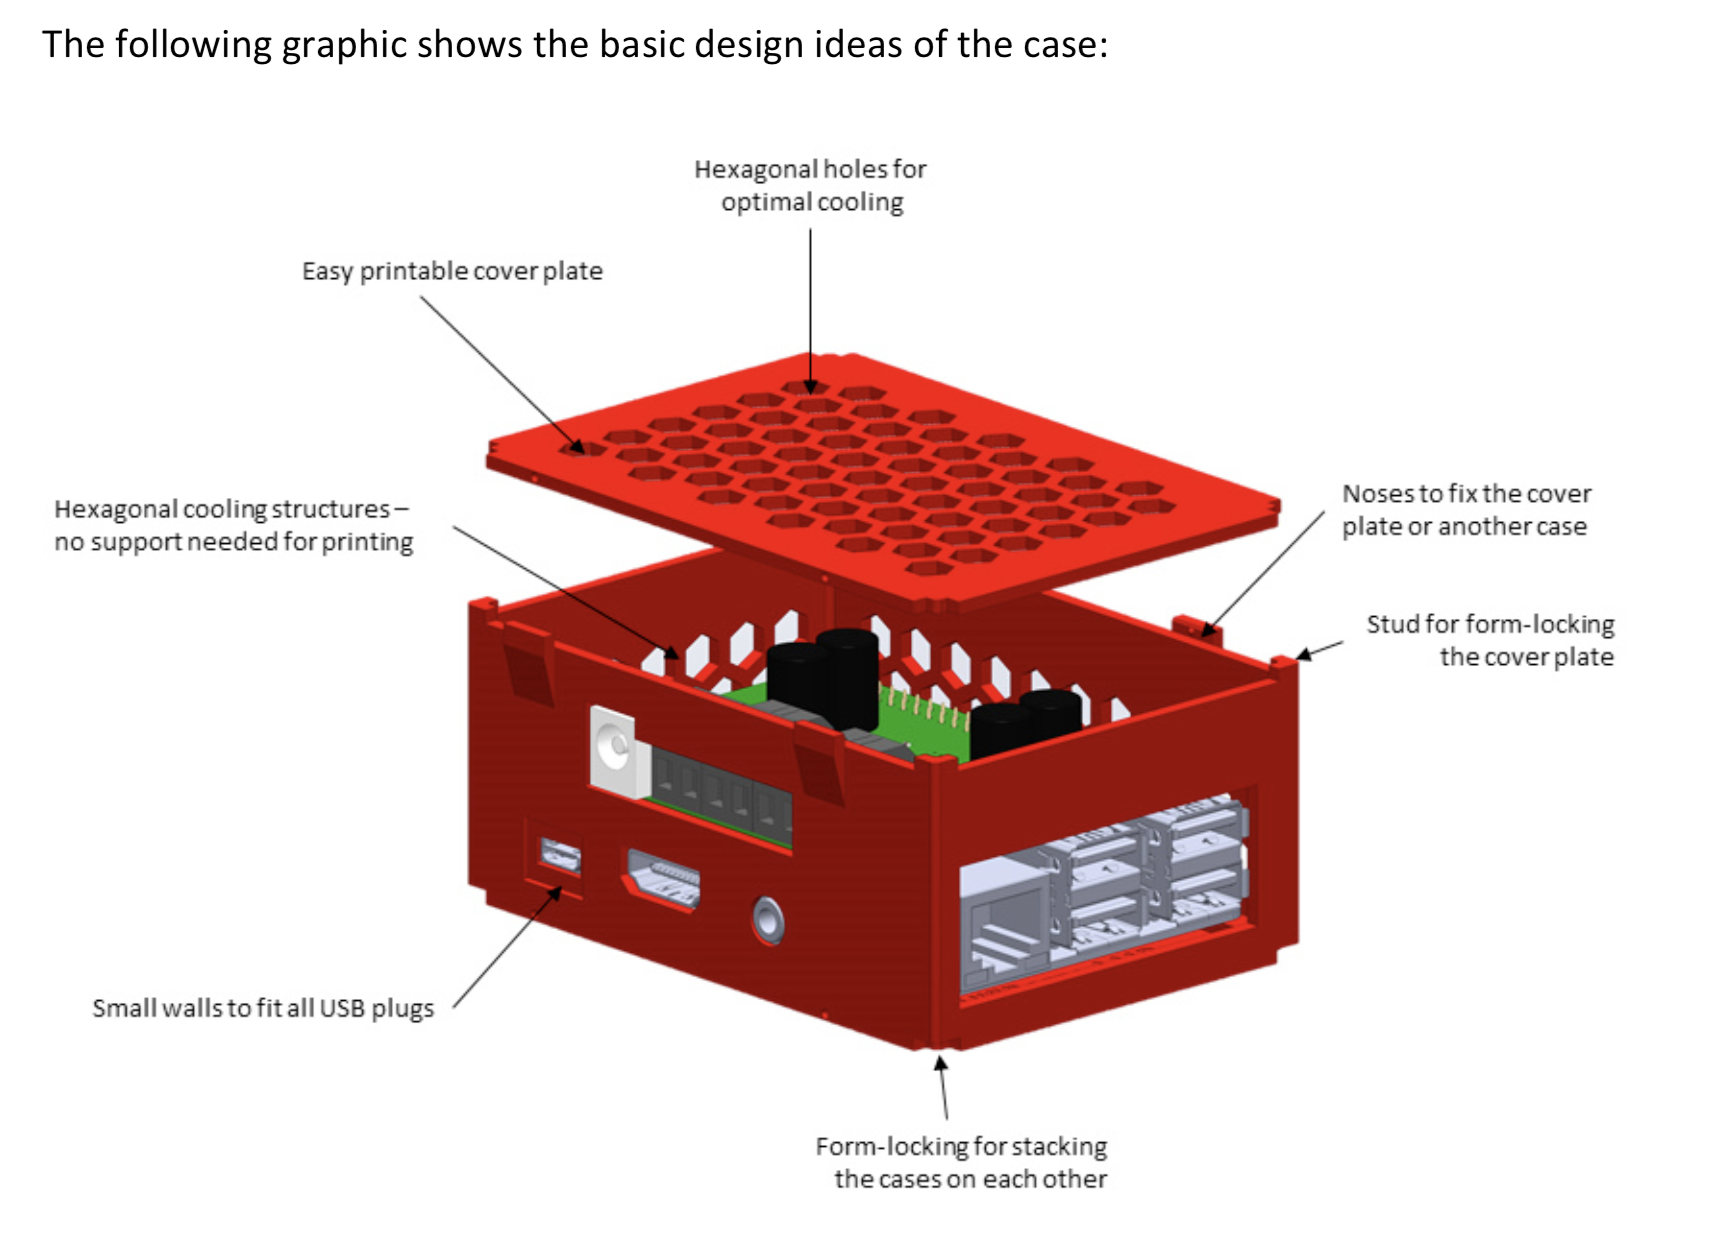
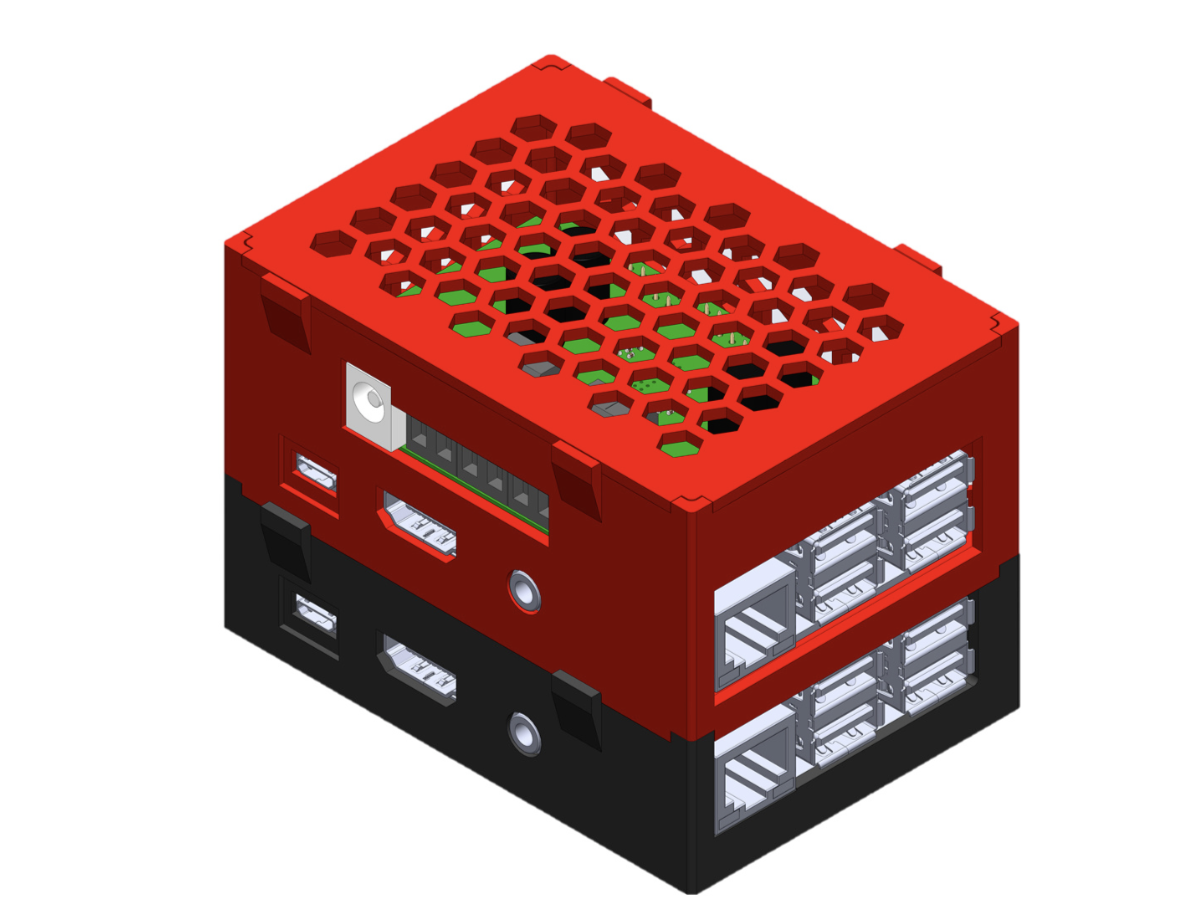
The basic design of the case
Variations of the case
I designed the case for the HiFiBerry AMP board and tested it with this board. For the AMP board everything worked fine, and I could put the assembled RPi with the HiFiBerry board into the case. The design of the DAC and Digi version is based on the HiFiBerry 3D models. But I couldn’t test the assembly of the board into the case because I do not have these boards. It may be necessary to assemble the HiFiBerry boards after putting the RPi into the case because of the chinch connectors.
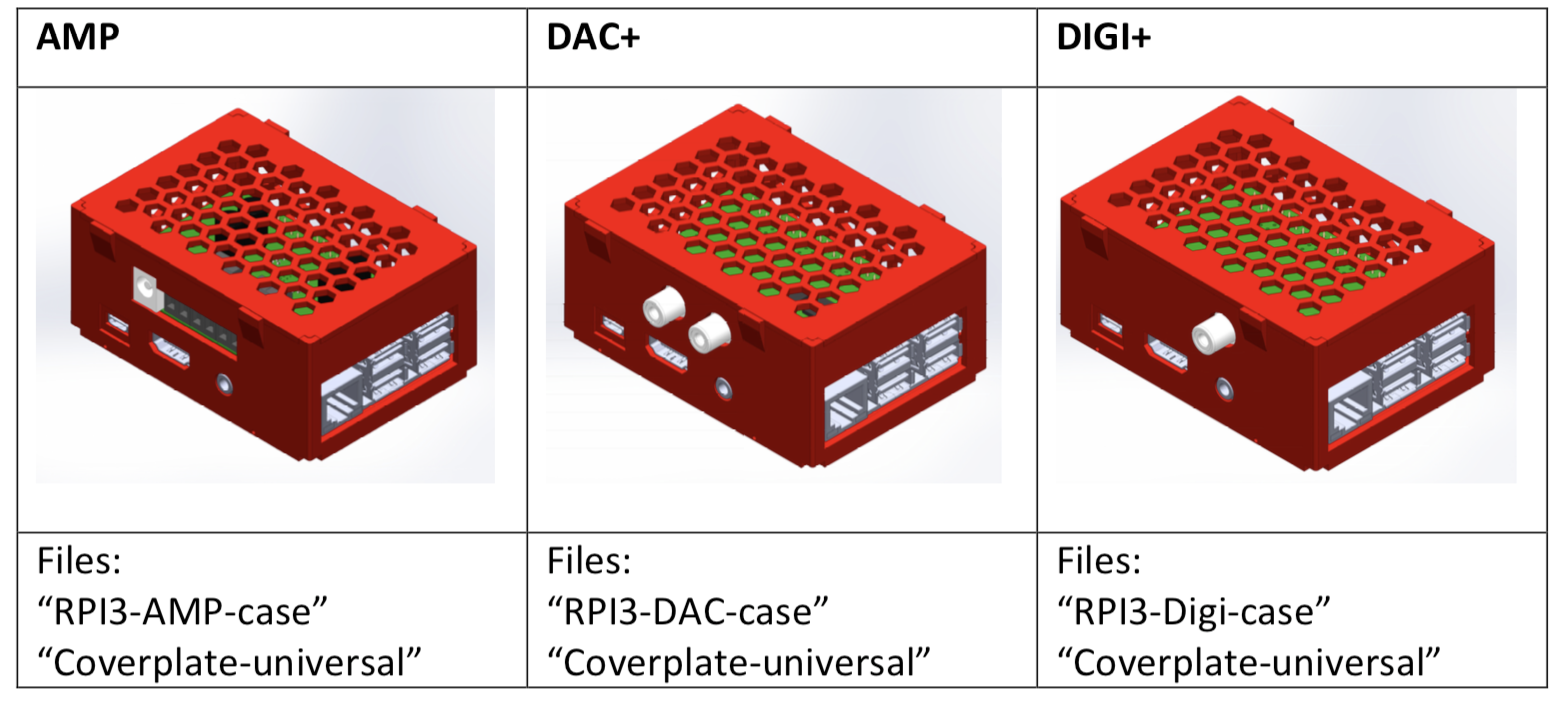
Every file is available in the format “.stl” to slice it for 3D printing. To modify the files, there is a .step file of each part.
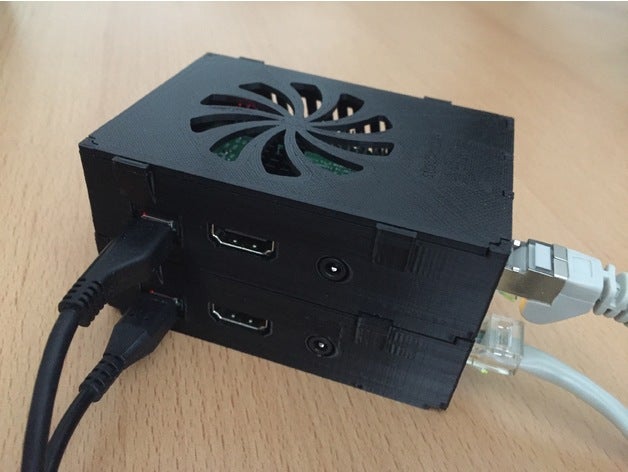
Of course, you can also stack different cases. For example, an AMP case on the standard case for the RPi on Thingiverse:
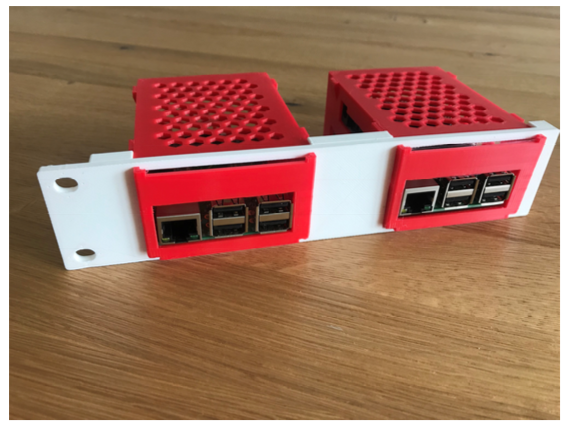
Rack installation
Especially for the installation of in-ceiling speakers, it is reasonable to install the RPi with the AMP in a rack. Therefore, I designed a rackmount for the case. As basis, you can use the standard case for the AMP and the other boards. The case can be clipped into the rackmount without any tools. Additionally, you need a special cover, which is smaller than the standard cover. Just see the pictures below.
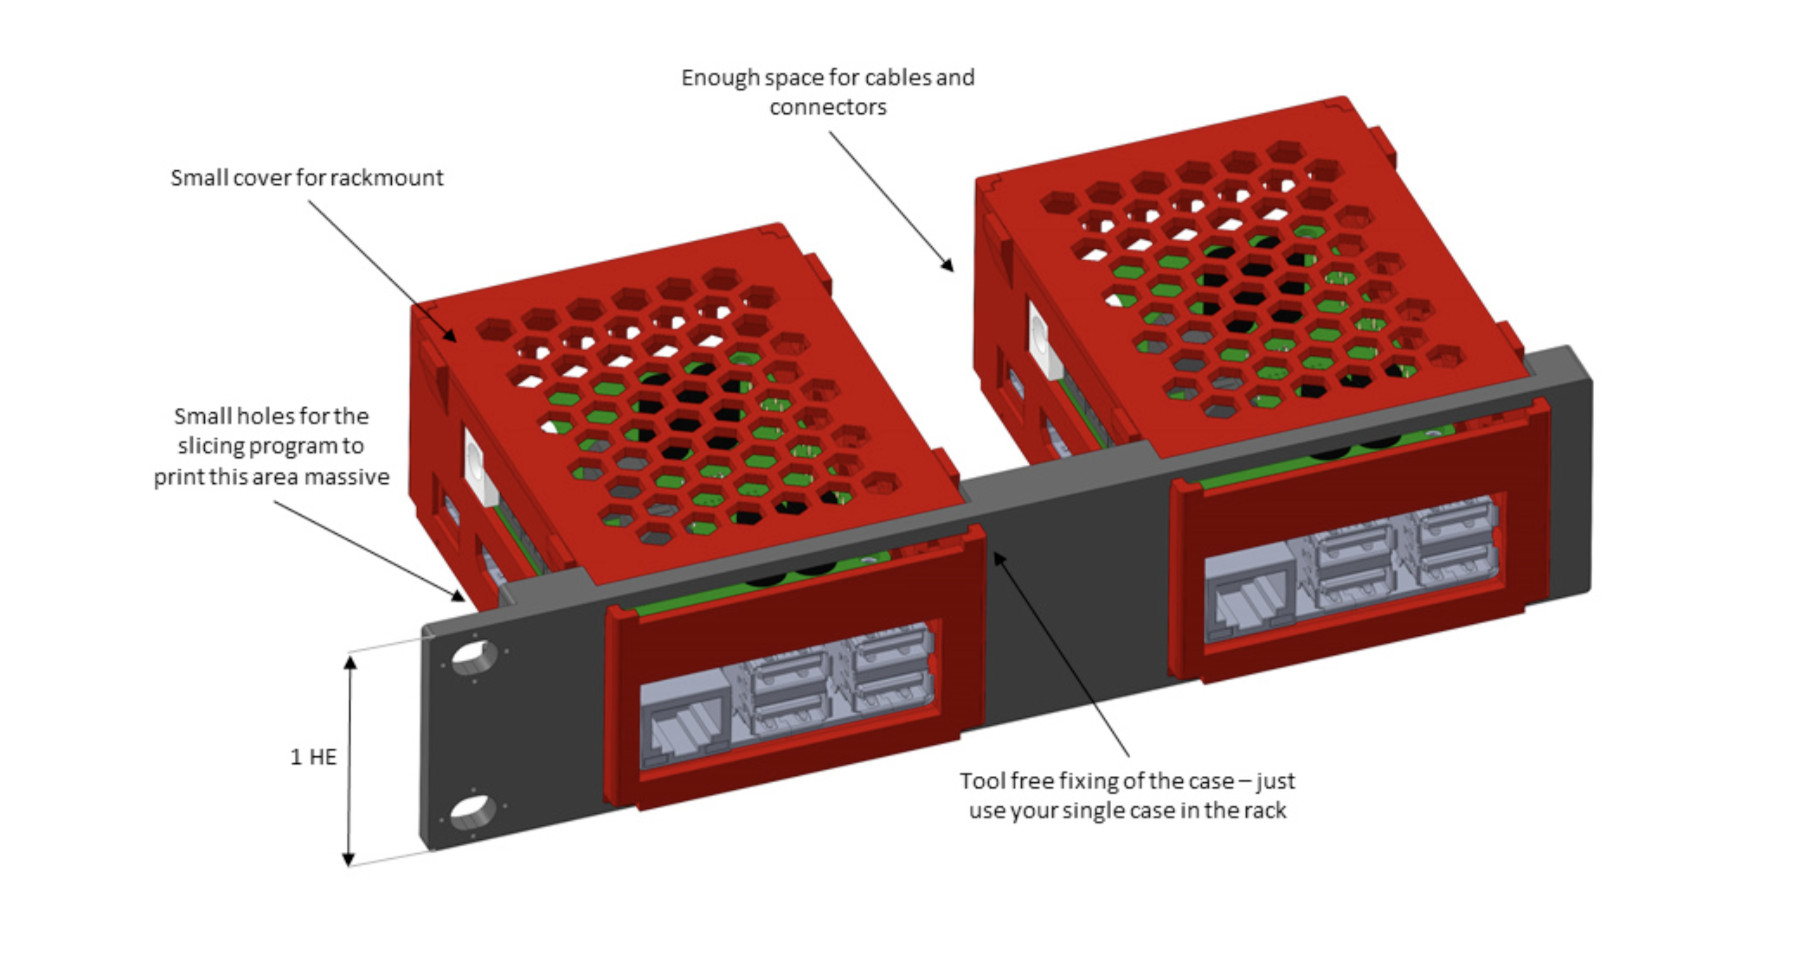
The rackmount is designed to print it in a printer like the Anycubic i3 mega with a printing area of 210 mm x 210 mm. Of course, you can also use the rackmount with only one RPi.
Files: “rack-basis-hifiberry” “coverplate-rack-hifiberry”
Printer settings
To print the case, the cover and the rackmount, I used a standard Anycubic i3 mega and standard PLA filament. The slicing was done with Cura 4.
Here my settings:
Layer Height
Wall thickness
Top Layers
Bottom Layers
Infill Density
Retraction
Print Speed
Support
Support Overhang Angle
0.2 mm 1 mm
5
5
30%
3 mm
60 mm/s Yes
65°
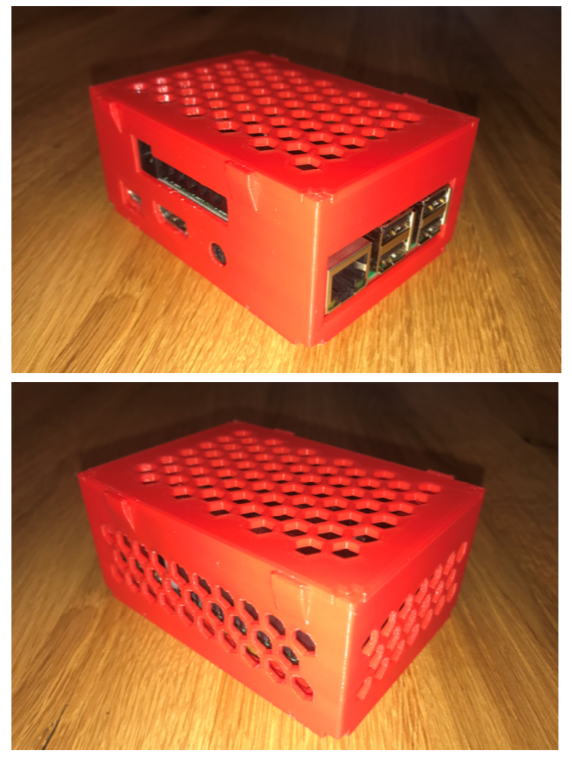
The result after printing
Single case for Raspberry Pi with AMP2
Rackmount for two Raspberry Pi with HiFiBerry AMP2